When you click on links to various merchants on this site and make a purchase, this can result in this site earning a commission. Affiliate programs and affiliations include, but are not limited to, the eBay Partner Network.
**NOTE** The following pictures are not meant as a guide to the oil pan gasket R&R on 3.0 liter Duratecs! JTIS or alldatadiy is highly recommended, for the specfics, torques and such.
For the first time DIY'er, expect approximately 5/6 hours. It is not a difficult job, just time consuming. There are 2 basic ways of tackling this job:
1) Lower the subframe, several problems going this way without a lift, plus the 4 subframe bolts are SUPER TIGHT. Again there is a special detail if going this route that is in JTIS or alldatadiy. Personal injury WILL occur if not followed!
2) Raise the engine, as pictures below depict. A cherry picker or fender lift will be needed. Instead of those you can also use a floor jack at the bellhousing area per Brutal.
Again the following pictures are for educational purposes only!
Enjoy.....
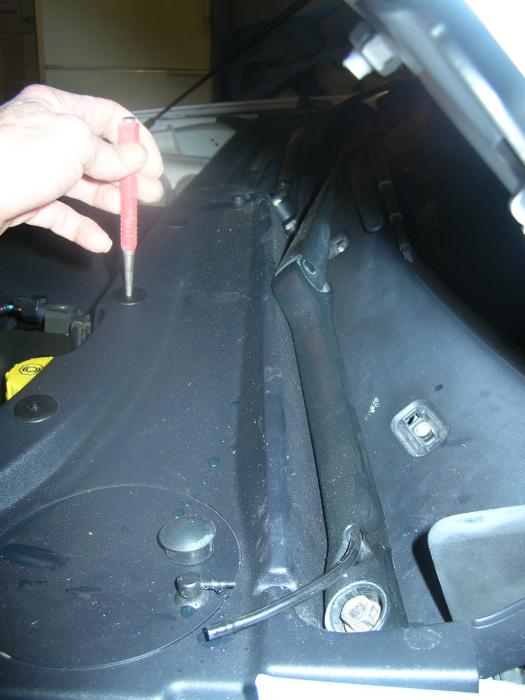
Remove cowl:
Remove crossbar:
The 2 pictures above are not required, just gives the DIYer a bit more wiggle room. The oil pan can be removed without removing the cross bar, but the intake manifold will touch on the crossbar when lifted.
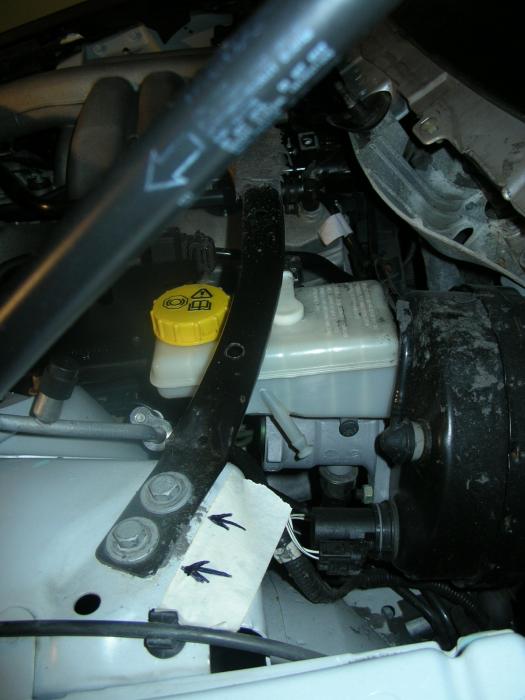
Moving on, under vehicle:
Last edited by joycesjag; Mar 17, 2012 at 05:35 AM.
Copied from another thread that created this thread:
Originally Posted by Brutal
Damn ya'll would never make money in a shop
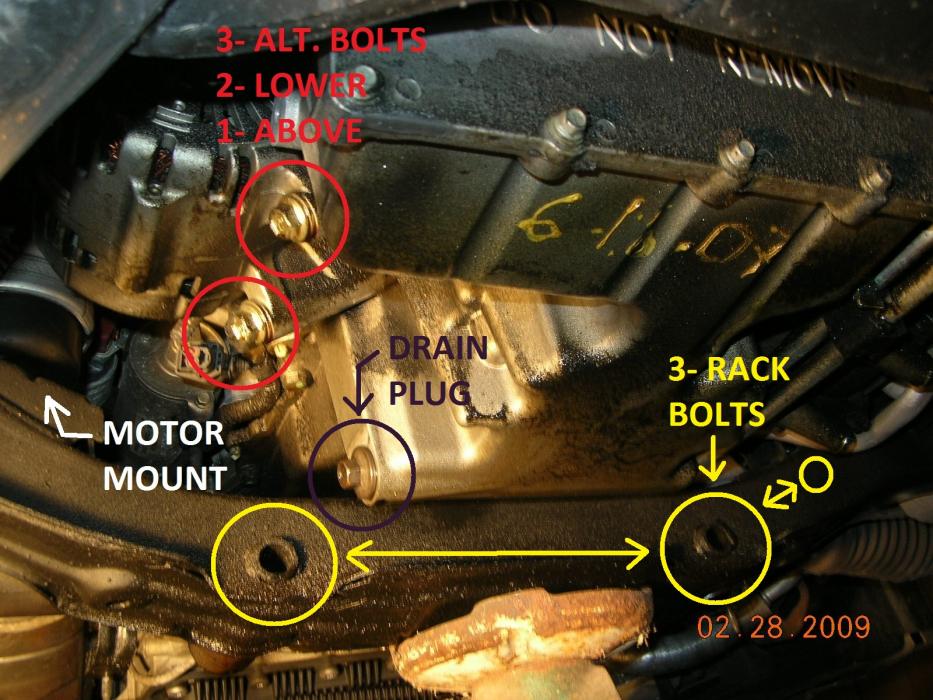
only remove the 2 lower ac compressor bolts, remove both lower alt bolts, and "almost" remove the upper so the alt is free to pivot and move. Dont need to remove the cowl or cross brace either. The car has to be up high enough to drop and turn the pan to drop away from the oil pump pickup too
Again I am just a DIY'er. Having the AC and Alt off and tied up gives more "wiggle room" when you are on your back with 18" between garage floor and bottom of vehicle. Only adds a few more minutes to completely remove and hang.
I left the cross bar on when I did Joyces car. There is room when engine is jacked up but, its really tight especially when putting the oil pan back in place. For Joels vehicle, I removed the crossbar and had enough room for your hands, Georges and a buddies!!! Again a few more minutes aids the DIY'er.
Incidently I did not remove the the wiring from the ALT or AC and AC lines.
Good information but there is no mention of the gear change when raising the engine and gearbox. Do you have to remove the gear change surround from within the car to prevent damage in this area??
Good information but there is no mention of the gear change when raising the engine and gearbox. Do you have to remove the gear change surround from within the car to prevent damage in this area??
Padge I am not quite following what your asking about "gear change".
Originally Posted by abonano
Rick - I don't have a 3.0 motor - but truly enjoyed reading this - Thanks so much for sharing!
When I am talking about the gear lever when raising the engine/gearbox to remove the oil pan, my question was this. Is there a danger that by raising the engine/ gearbox that this in turn will cause the gear shifter/selector (automatic) to raise also and thus damage the trim that surrounds the gear selecter inside the car.
Any advice on this would be appreciated as I really need to fix my oil leak sooner rather than later.
The shifter (for the autobox) on the centre console is connected to the box via cables. It's not mounted on the autobox or engine so unless you're raising engine/gearbox a long way should be OK. I think - let's see what Rick says...
A million thanks to Rick and Brutal for this and all the other information and support they have provided on this forum. This thread gave me the courage to change my oil pan gasket.
The change went smoothly except I was surprised by two brackets attached above the �Do Not Remove� plate. You can see the bosses for these brackets in my photo. I guess they are an improvement made for late model S Types like my 2007 or probably someone would have mentioned them here earlier. I had to remove the alternator completely to access the bracket fasteners, but even then they were still a bitter x-wife (as Zane would say) to get at.
I took off the strut tower brace which made it much easier to get the pan in and out IMHO.
Are we putting the dot of silicone at the front cover to block seam? It is called for in the manual and I noticed mine had been done on the previous installation, whenever that was.