When you click on links to various merchants on this site and make a purchase, this can result in this site earning a commission. Affiliate programs and affiliations include, but are not limited to, the eBay Partner Network.
Injector Removal Part II: Plastic Wiring Harness and Spark Plug Wires
Thanks to the great help of NBcat I have gotten my engine bay cleared up for easier injector removal. Removing the windshield wipers and the sound insulation is the key.
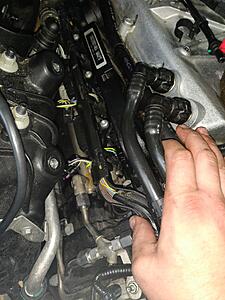
Next, what to do with the plastic wiring harness? It's in the way and I've unplugged everything at the front of the engine around the alternator. But there looks to be 2 wires grounded to the alternator still preventing me from shifting the thing out of the way.
And with what I think are the spark plug wires (2nd picture) how on earth are those disconnected? I've been wiggling them around and can't figure it out
Last edited by GGG; Sep 12, 2020 at 05:30 PM.
Reason: Edit typo in thread title
The connectors in the second picture are for the fuel injectors. To remove them, squeeze the small tab and pull the connector off. Avoid putting tension on the wires going into the plug.
To gain more movement from the wiring loom, disconnect the three black plugs at the front of the head. Secure the wiring loom out of the way with wire ties.
On Bank2, the coolant reservoir and suspension brace must be removed and the low pressure fuel lines disconnected and plugged to avoid fuel spillage and dirt entering the lines. The charge cooler lines must also be removed by pressing them in and squeezing the tabs on the connectors. Have rags handy to contain any coolant that may escape from the charge cooler.
I'm only working with Bank 1, as my misfire codes are over there. I got those fuel injector plugs undone. I did disconnect (4) plugs from the front of the wire loom, but there are 2 wires that head to what appears to be a ground screw at the alternator. Seems very difficult to get to.
The one thing that is confusing me now is the fuel rail. I have all four bolts off the rail. I have loosened the nut at the junction and the nut connecting the junction of the high pressure rail. The service manual say nothing about the end of the rail, towards the back of the engine after Cylinder 7- there are wires connected to it. Trying to remove this part safely.
There's no need to remove the fuel pressure sensor at the end of Bank1 fuel rail. You can remove the connector by pushing the small yellow tab up and squeezing the connector.
Use shop rags around the fuel rail and pull straight out; the fuel rail should become detached from the injectors. Sometimes, the injectors come out of their bores with the fuel rail.
Yes I do have some brushes and carbon cleaning spray. I will give this a go tomorrow, thanks for your help. Taking this job small bits at a time and hope to put together a helpful guide for others after I get this finished.
Also, it looks like on my model year (2011), my HP fuel line has a different junction than the one pictured in the tutorial here for a F-type. I assume that I need to remove the entire junction as well to get it to shift around enough to pull off the rail?
The fuel line junction can be moved by removing the 8mm nut under the wiring retainer. Loosen the three pipe junctions with a 17mm open end spanner and have towels handy to absorb any fuel that drips out.
Once the pipe nuts are removed, the junction can be moved and the fuel rail connection moved free of the fitting.
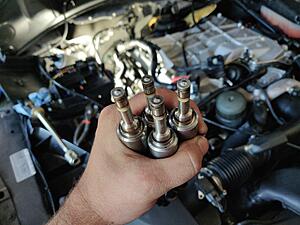
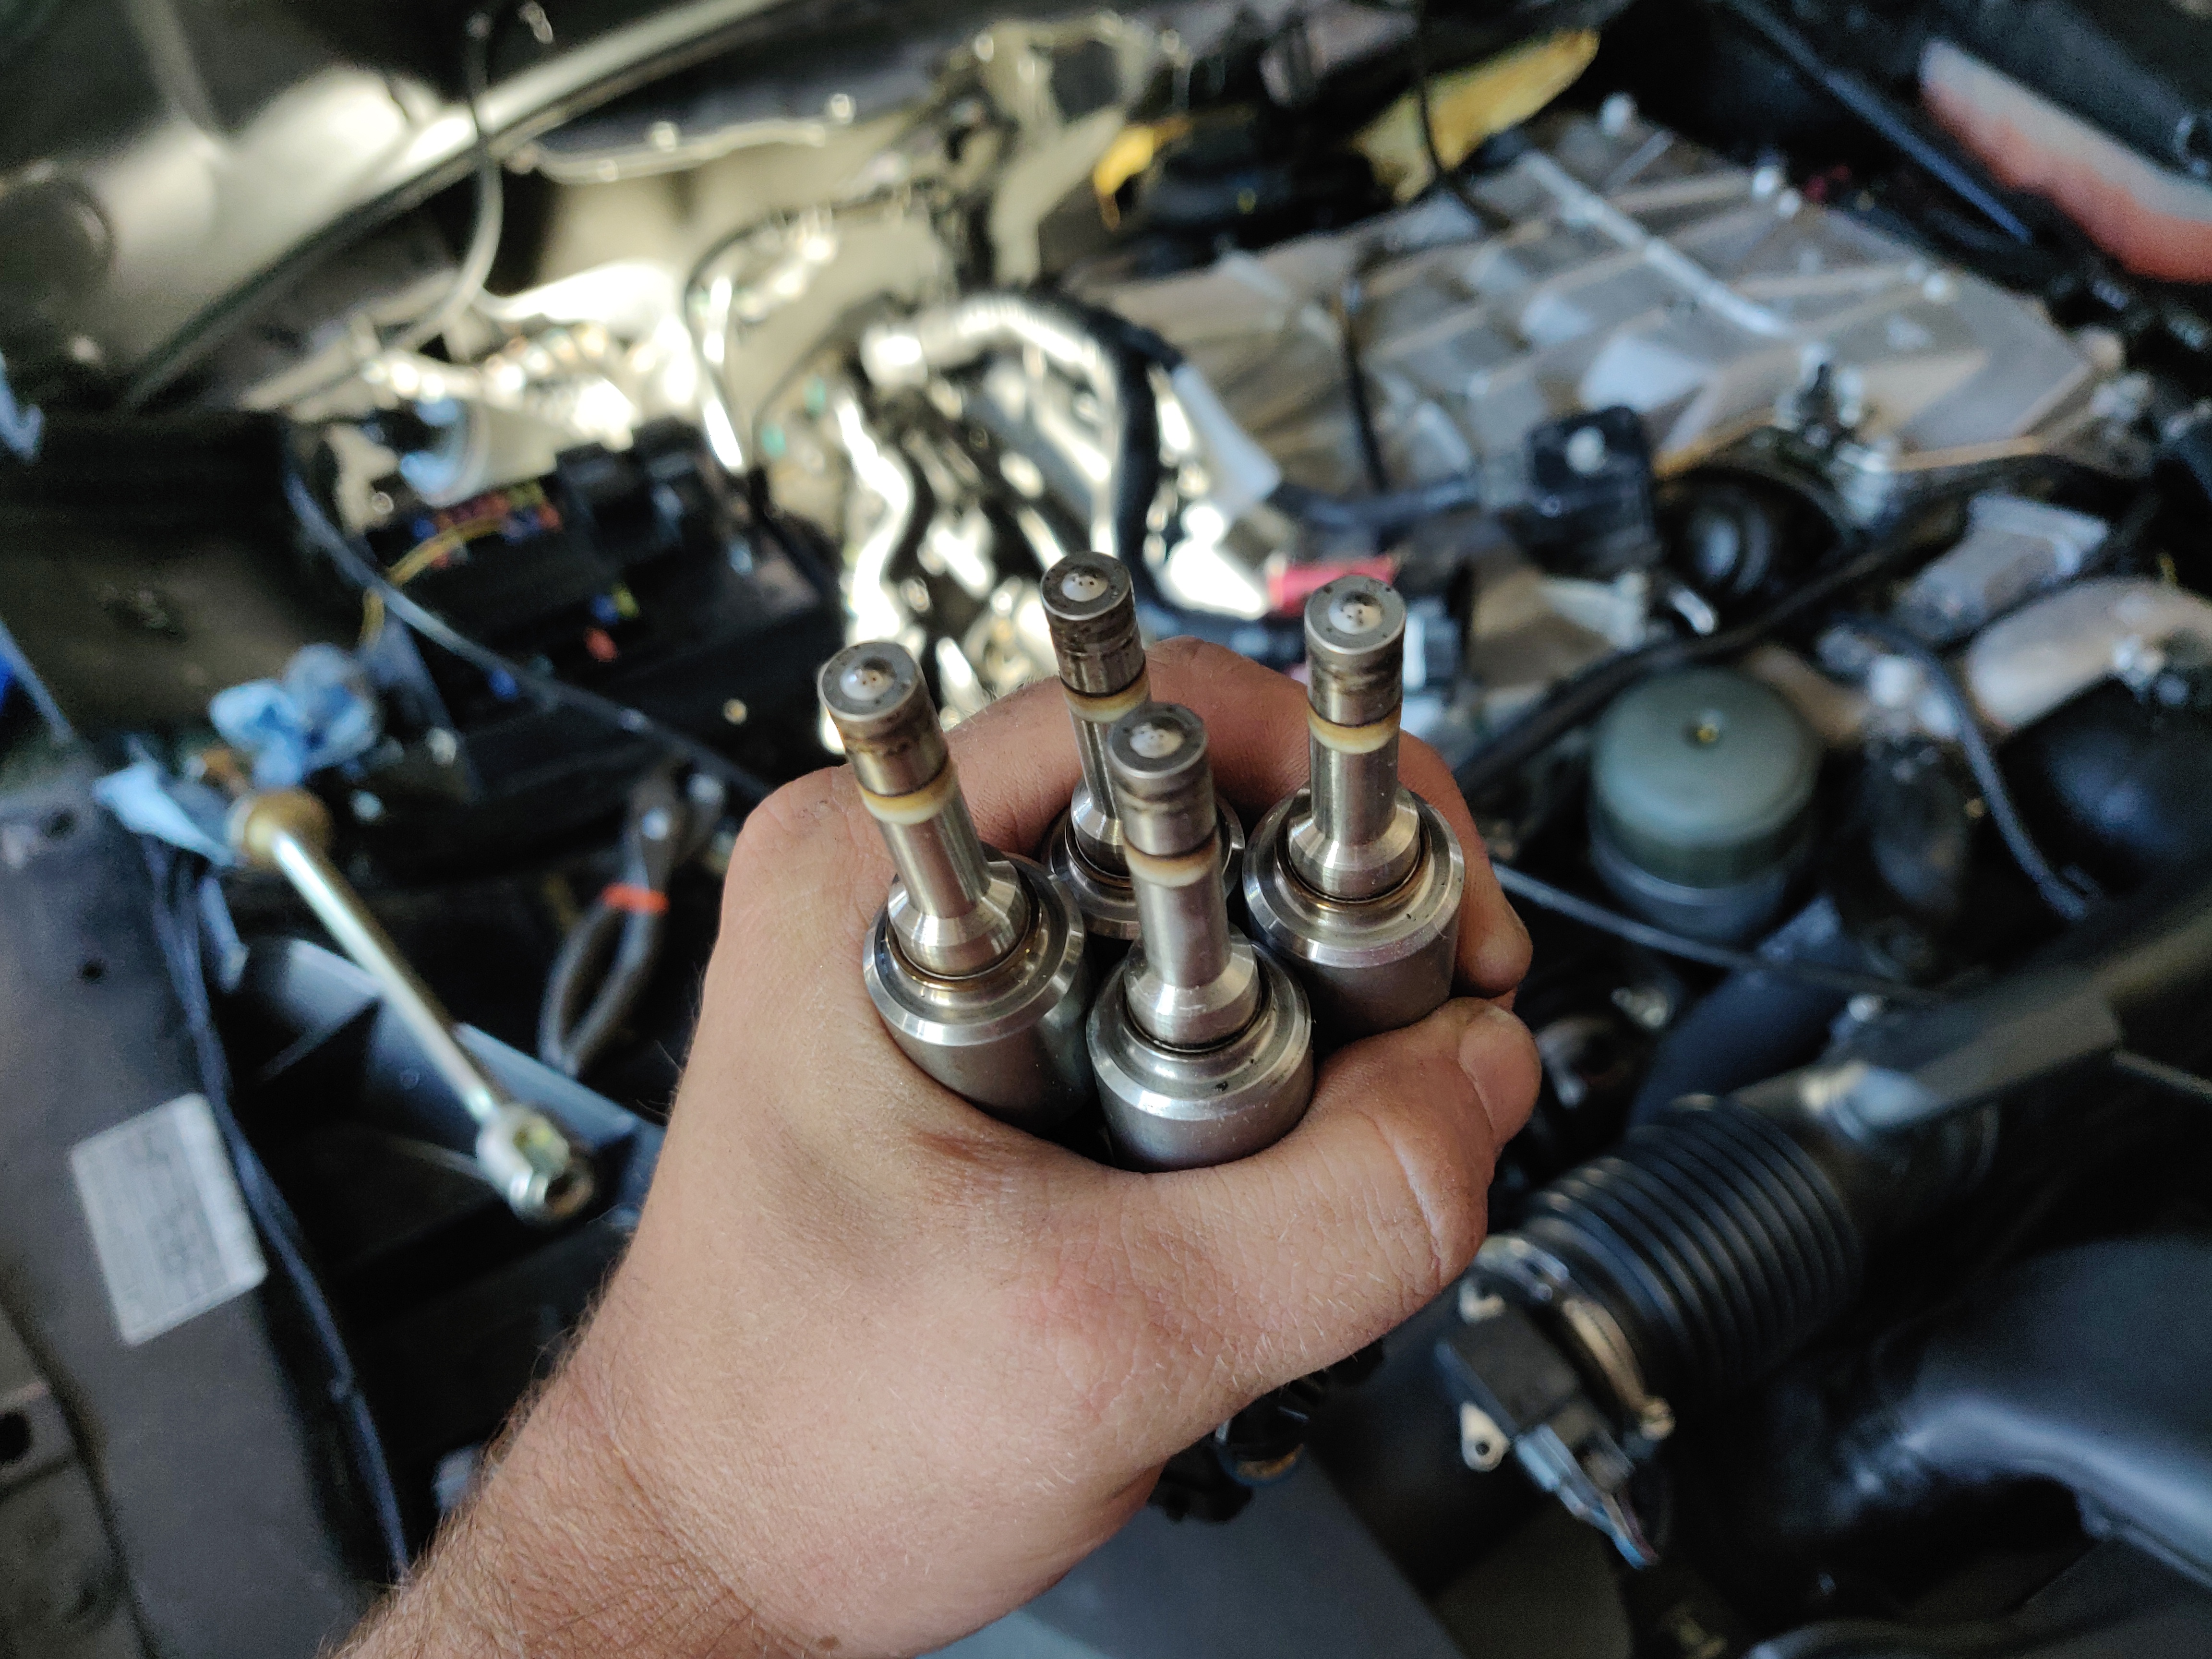
Well after much finagling, all 4 injectors are out. Pretty disappointing to be honest, after wiping the crud off the base, they actually don't look dirty? Not sure why they are failing but at least they are out. I was only getting a Cylinder 1 injector code, but they all look the same as far as buildup (none?)
I did not need to remove the HP fuel line to remove the fuel rail. It had enough space to wiggle by following NBCat's instructions.
Since I'm sending them off to be cleaned and tested, might as well just send them off. InjectorRX will not charge me if it does not test OK after cleaning