When you click on links to various merchants on this site and make a purchase, this can result in this site earning a commission. Affiliate programs and affiliations include, but are not limited to, the eBay Partner Network.
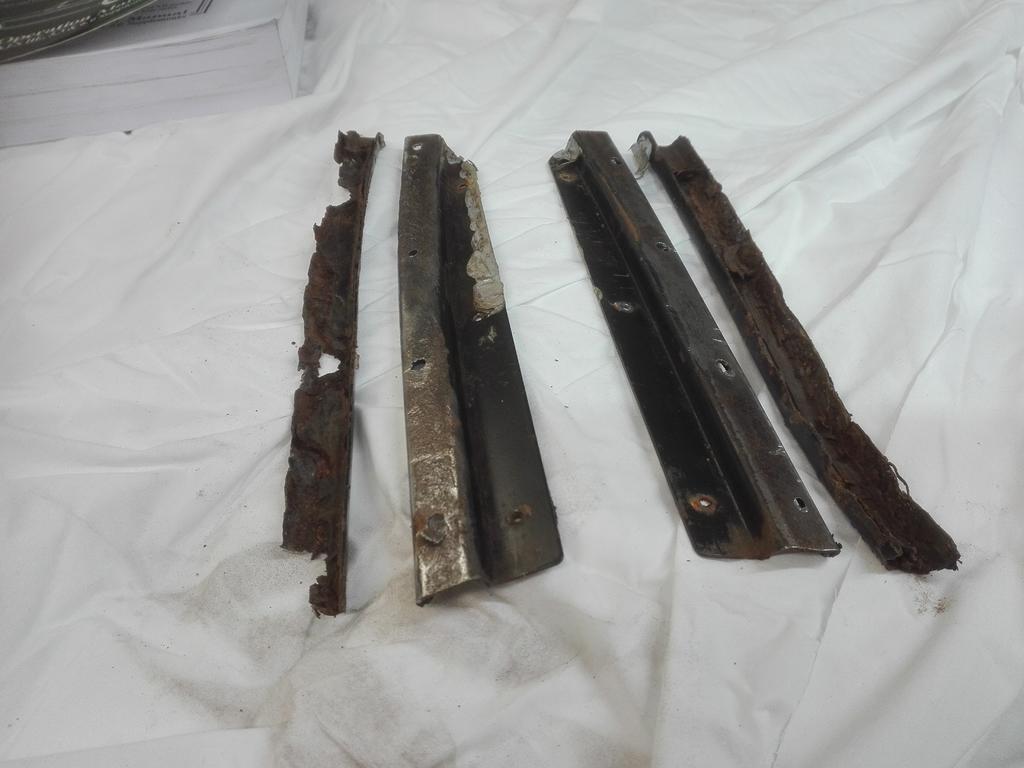
Hi. I am there at the moment. In my case, both, LH/RH channels were badly corroded, top one is almost completely gone. Lower ones are still serviceable but needs some puffing.
Just separated them and started to make new top channels.
Found out massive amount of silicone, which clearly used for sealing water leaks after channels corroded and became leaky. But, in my case not that much sealant below channel assembly. Maybe someone tried to seal something on yours, but never put enough as bead seems to be still far away from channel??
Almost finished fuel tank/fuel hoses on trunk area. Everything installed back, with brand new 2-layer hoses and after smell test i was happy... no fuel smell anymore. Nothing leaked there at the beginning, but old original hoses seems to let smell thru. Rear screen installed too.
I haven't made it back to working on the door rubber yet. I was waiting for what new parts I could get. I also have to drill a few screws that sheared off and source all new ones as they're all corroded junk.
Also decided to go after the trunk and the fuel lines. Lots more corrosion and will need to get a new trunk seal. Also noticed that the trunk floor has been pushed in a little. Might get to put those body tools I bought to good use.
Looks that you have things to do on trunk area... I would pull the tank and refresh it now, also worth to check that rivet under the tank... as mentioned here and there by experts.
My trunk floor is dented inwards too, just slightly, under spare wheel area. Think someone in the past used jack on wrong place. Smooth contour and no paint damage-> no action needed.
I just did that exact damage to the boot floor :-(
Rear suspension off. Got a big ****-off trolley jack in under the raised car just fine, pumped up high to a beam across the well where the subframe goes. Lowered the car gradually onto a dolly. As the jack arm angle changed, it punched the boot up. Silently.
Fortunately, the bodywork and paint is yet to be done. Glad to see I'm not the only idiot ;-)
Moral of the story, when jacking things, stop regularly to inspect your clearances!
Ordered 4 brake calipers, front wheel bearings, and steering rack boots to accompany the previously purchased brake pads, rotors, shocks and brake hoses among other stuff..... renovations continue.
Fitted later illuminated sun visors in my 1984 HE some time ago and got S type covers to cover the screws, after covering them in the same leather as the visors they fit quite nicely.
Rex
How did you run the power to the facelift visors?
I removed the interior light and extended the wiring to each visor, and made up a cover to fit over the hole left where the old one had been.
turned off for picture
Same wire that works the interior light. It's all there. I did purchase all new from jdht sent them straight to Aldridge trimming to cover in isis blue leather and jdht included the short harness with correct plugs already. Just connected to old int light wire.approx 6 years ago.
I just did that exact damage to the boot floor :-(
Rear suspension off. Got a big ****-off trolley jack in under the raised car just fine, pumped up high to a beam across the well where the subframe goes. Lowered the car gradually onto a dolly. As the jack arm angle changed, it punched the boot up. Silently.
Fortunately, the bodywork and paint is yet to be done. Glad to see I'm not the only idiot ;-)
Moral of the story, when jacking things, stop regularly to inspect your clearances!
Well, I get a pass, as the car was like that when given to me.
Looks that you have things to do on trunk area... I would pull the tank and refresh it now, also worth to check that rivet under the tank... as mentioned here and there by experts.
My trunk floor is dented inwards too, just slightly, under spare wheel area. Think someone in the past used jack on wrong place. Smooth contour and no paint damage-> no action needed.
That spare wheel... ouch.
Based on what I can find, would that be the rivet under the fuel tank that tends to wear a hole through the bottom of the tank? I'm already thinking about removing the tank, so I'll inspect for it.
Based on what I can find, would that be the rivet under the fuel tank that tends to wear a hole through the bottom of the tank? I'm already thinking about removing the tank, so I'll inspect for it.
Gracias!
Yes, that's the one. Just drill it out, nothing else needed to be done.
Hi, I just finished the installation of a new, custom cold air intake upgrade on my '94. Given the stock intake necks down to 1.5 inches, but the throttle-body opening is 3", I used 3" as the minimum area throughout. I printed all these parts off my 3-D printer. I included a canister, K&N style filter (inside the metal can that you see in the pictures), which doubles the filter surface area of the stock filter. I also designed new intake mouths (on top of the radiator) to ensure no restrictions on the 3" area. I am super pumped with the results. The car sounds different - with the small intakes, it sounded a bit like a shop-vac when it was started, because its sucking so much air through that tiny hose; now its actually quieter
The car was noticeably more responsive, too. I have a spot where if I floor the car in Sport mode, I can just hit 60MPH between the intersection and a bridge. With this new intake, I hit 65MPH!!! - no joke. Over the next couple weeks, I'll monitor the MPGs to see if there is a measurable change there too. One of the best car mods I have done lately.
How does that affect the intake noise? Do you get more snarl, or less?
I've been thinking about intakes but taking AJ6 Engineering's writings on the topic as my starting point - they offer a hi-flow filter that goes in the stock air box. (They have several pages on air and exhaust flow, here's one for starters: How Things Are Done | aj6 engineering )
Hi, I just finished the installation of a new, custom cold air intake upgrade on my '94. Given the stock intake necks down to 1.5 inches, but the throttle-body opening is 3", I used 3" as the minimum area throughout. I printed all these parts off my 3-D printer. I included a canister, K&N style filter (inside the metal can that you see in the pictures), which doubles the filter surface area of the stock filter. I also designed new intake mouths (on top of the radiator) to ensure no restrictions on the 3" area. I am super pumped with the results. The car sounds different - with the small intakes, it sounded a bit like a shop-vac when it was started, because its sucking so much air through that tiny hose; now its actually quieter
The car was noticeably more responsive, too. I have a spot where if I floor the car in Sport mode, I can just hit 60MPH between the intersection and a bridge. With this new intake, I hit 65MPH!!! - no joke. Over the next couple weeks, I'll monitor the MPGs to see if there is a measurable change there too. One of the best car mods I have done lately.


 I would pull the tank and refresh it now, also worth to check that rivet under the tank... as mentioned here and there by experts.