
2007 XK Coupe Shifter Assembly R&R


Thread Starter
|
Junior Member
Joined: Mar 2014
Posts: 7
Likes: 10
From: Los Angeles
Both the black and chrome "film" around the shift lever have bubbled and chipped until it looks awful. I understand the full shifter assembly has to be replaced, no individual parts are available - and I've located a new one under $350.00. Has anyone done an r&r on this piece? I assume the assembly "box" itself is easy, screws and an electrical connector - but how does the veneer deck itself come up ...? I see references to "8 clips" but - how do you un-clip them, what direction do they have to be pushed to be undone? And with what do I push - screwdriver, credit card, plastic shiv ...?
Any and all ideas, tips, tricks, caveats and horror stories would be welcome ...
Any and all ideas, tips, tricks, caveats and horror stories would be welcome ...
Veteran Member


Joined: Dec 2008
Posts: 6,460
Likes: 2,582
From: Florida
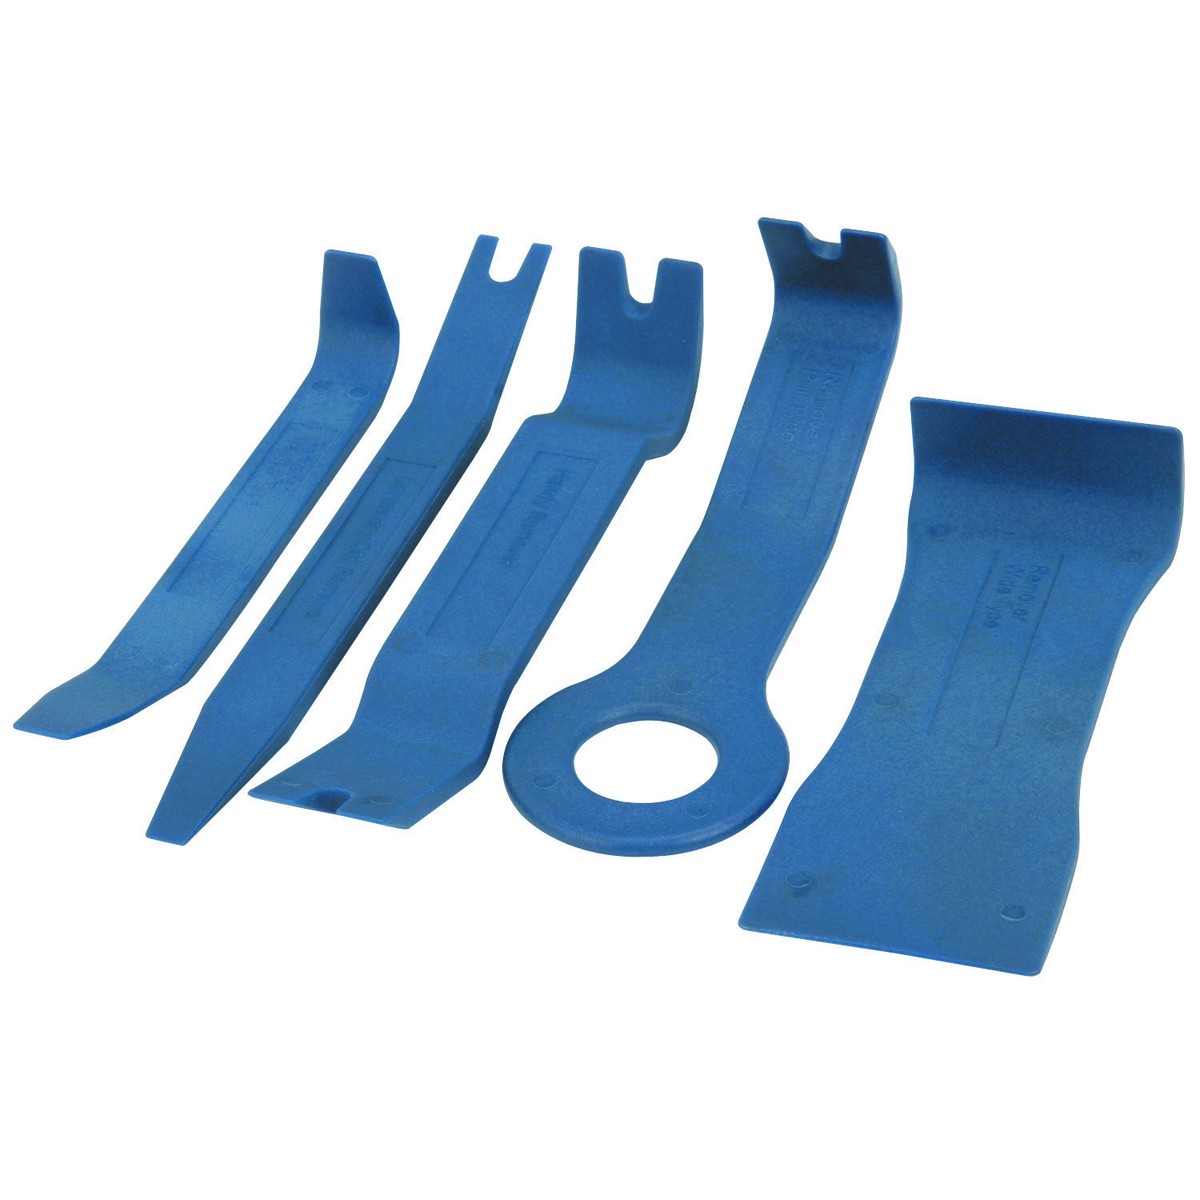
A nylon trim removal tool would come in handy. Very carefully pull up on the wood trim, the clips are underneath and come up with the trim. The shifter surround is also attached and will come up with it.

Veteran Member

Joined: Apr 2012
Posts: 4,959
Likes: 1,240
From: Los Angeles CA
This may be off the wall; but my Jaguar dealer replaced three different shifter/shifter panels on my 08 at no charge that had the same issues you describe. There may be a TSB out on this or maybe you can Jaguar NA to replace it.
Thread Starter
|
Junior Member
Joined: Mar 2014
Posts: 7
Likes: 10
From: Los Angeles
Thanks, I have the diagram - but I can't tell which way the clips release - by pushing in toward the lever (and away from the doors) or out away from the lever (and toward the doors) ...?
I'm beyond basic warranty as well as the extended warranty ... the local dealer dismissed my complaints about the black and chrome "film" coming up - and the "bubbling" dashboard leather on my garaged XK - several times, saying that JNA didn't guarantee cosmetics or trim after the basic coverage. I've looked and my complaints never got written on the service orders, so I can't even prove that I asked.
This same service department dented my steering wheel medallion during the last service there - and $3 or $4 in coins in the center console disappeared ... the 3 or 4 bucks aren't the issue, but I thought J mechanics were better paid than that ...!!! Never went back there ...
Veteran Member
Joined: May 2013
Posts: 3,425
Likes: 1,140
From: London, UK
My guess is: they push inwards, i.e. they clip under the edge of the surrounding panel(s). If you want to be sure, and no-one else on the forum comes up with the answer, visit another dealer or indy shop (or even an interior trimmer) and ask - a reputable place should be happy to give you 30 seconds of advice.
Trending Topics
Veteran Member
Joined: Dec 2008
Posts: 6,460
Likes: 2,582
From: Florida
No, it is very easy to do. I did it myself, that is why I responded to this thread in the first place. As I said in the first response on this thread, post #2 you just pull straight up. I did it to my XKR when I changed the wood to engine turn. Here is a pic of mine on eBay.
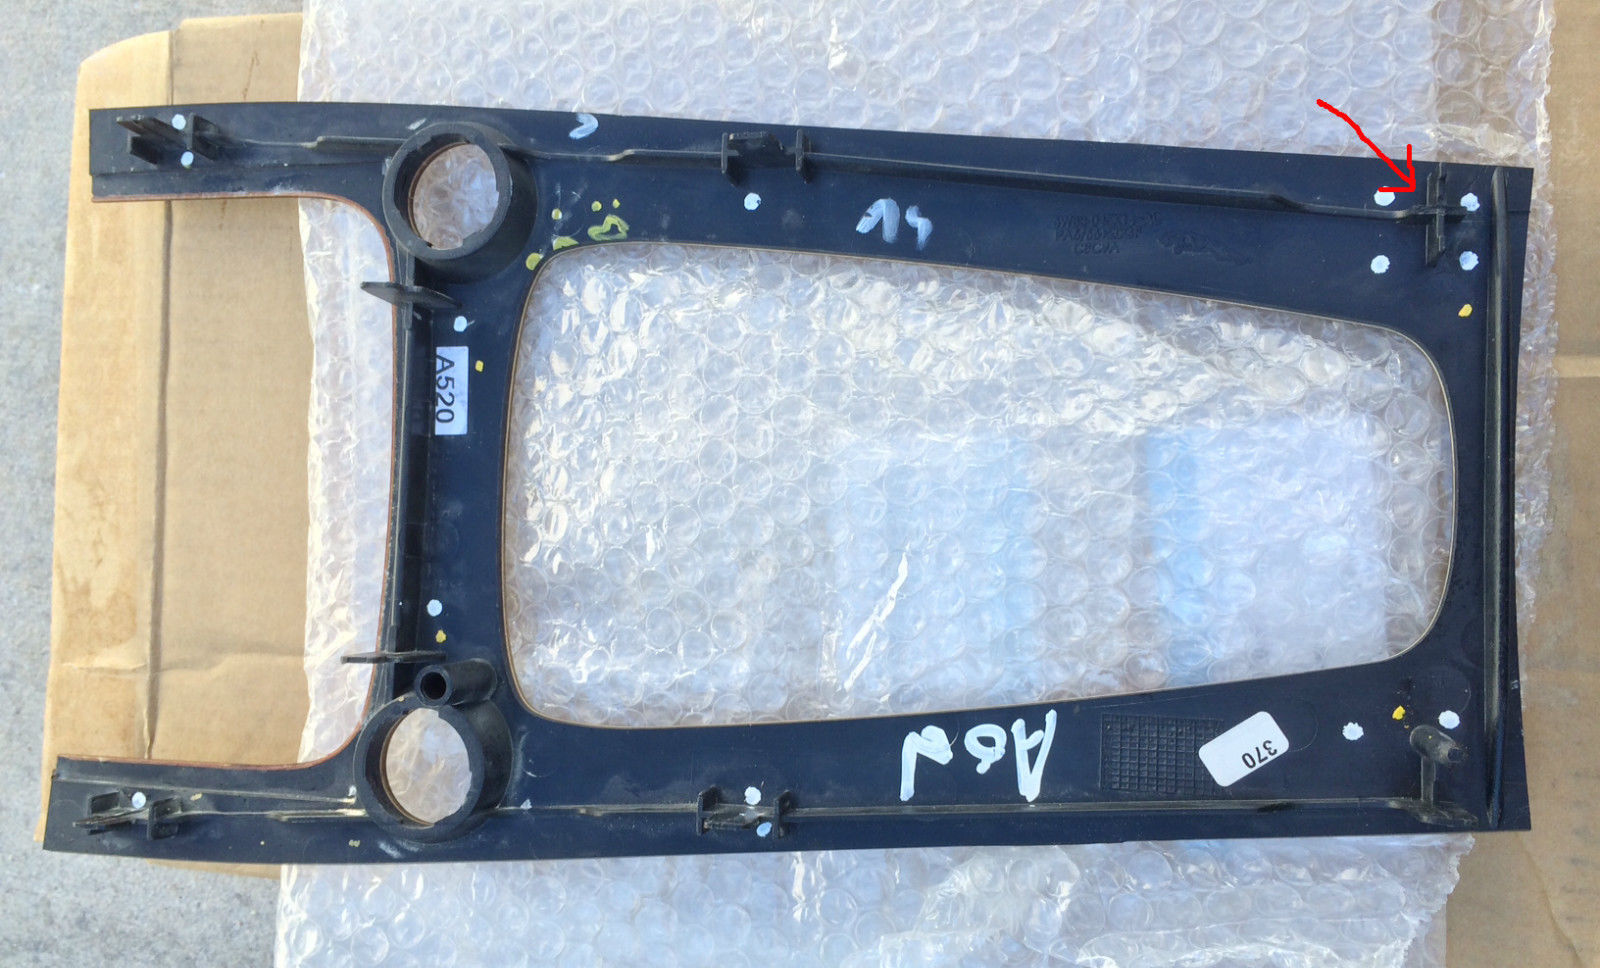
It does not get any easier.
It does not get any easier.
Thread Starter
|
Junior Member
Joined: Mar 2014
Posts: 7
Likes: 10
From: Los Angeles
JAHUMMER - thank you very much ... it looks like the "clips" would all release by gently pressing inward (toward the center line of the car) with something like a credit card ...?!?
I appreciate the feedback, everyone - last thing I want is to crack or scratch or break the veneer plate ...
I appreciate the feedback, everyone - last thing I want is to crack or scratch or break the veneer plate ...
Veteran Member
Joined: Dec 2008
Posts: 6,460
Likes: 2,582
From: Florida
No, you have to pull the the trim panel straight up, no sliding. Using my picture above as a guide it will be easiest to exert pressure at each clip point and pull/push up. I started at the ashtray end under the control panel and worked my way back. As I mentioned before it would help a lot to have nylon trim removal tools to get underneath the panel and not damage anything. Jaguar is known for overkill on the quantity of clips they use and this part is no exception, 8 of them for a tiny part.
Veteran Member
Joined: Dec 2008
Posts: 6,460
Likes: 2,582
From: Florida
Like this:
http://www.harborfreight.com/4-Piece...Kit-69668.html
5 Piece Auto Trim and Molding Tool Set
http://www.harborfreight.com/4-Piece...Kit-69668.html
5 Piece Auto Trim and Molding Tool Set
Last edited by jahummer; Mar 28, 2014 at 06:30 PM.
Thread Starter
|
Junior Member
Joined: Mar 2014
Posts: 7
Likes: 10
From: Los Angeles
S-U-C-C-E-S-S ...!!!
It took me just under an hour, from starting the car and backing it out of the garage, to shutting it off after pulling it back in. The project was a bit tougher than expected, but easier than I was afraid it might be ...
The surprises ...
1. you need a T30 torx driver (I had one - and found it!!!);
2. you'll need to take off the black plastic upper trim panels on both sides of the center console; and
3. the shifter assembly has not only the plug connector, it also has a physical linkage connection on the passenger side.
IMPORTANT: start the engine, shift into Neutral and shut off the engine -- the nagging bing-bing-bing will stop in 10 or 15 seconds ...
FIRST - my shifter knob just unscrewed - but check yours for any hex screws or other attachment method, which is more likely if you have changed your shifter knob or are working on a different model year than mine (2007 XK Coupe). Now pry the veneer wood panel straight up using a plastic tool ... I started at the ashtray on the passenger side, along the outside of the veneer panel, and worked my way rearward prying up all 4 clips along the right side, raising the panel just enough to free the clips (about an inch). Pry straight up -- then repeat on the driver's side from front to back. The back end of the panel now lifts up so you can reach forward to disconnect the 2 plugs at the front end of the panel - they each pull straight down, out of the female connector. Set the veneer floor panel aside.
NEXT - unscrew all 6 torx screws holding the long narrow black plastic decorative side panels in place - there are 3 screws along each side. Use a plastic tool or your fingers to pull off the two panels - there are a half-dozen or so clips on each one, just pry (or pull) straight out. The front end of each panel will bend in an outward direction into the knee well far enough to be able to get them out completely - I found it easier to fold the seat forward which let me get at the back end of each panel to release it.
NOW - on the passenger side of the assembly, sitting in the passenger seat, look straight down, about at the middle of the shifter assembly - you'll see a shiny metal knob sticking straight out from the assembly - this knob inserts into a black front-back linkage. I slipped a large blade screwdriver straight down from above to wedge the linkage off the knob - it pops off straight off toward the seat. Look at the passenger side of the new assembly - this will make a lot more sense seeing it.
ONE MORE STEP - on the driver's side, behind the black plastic decorative panel you removed, look for a green plug assembly just rearward of the assembly itself - this is where the shifter assembly connects to the car. The entire block (the plug and connector) can be pried out toward the door - I used that same large blade screwdriver to do it. Look at the new assembly plug and you'll discover how it disconnects from the car - now disconnect the old shifter assembly plug from the connector.
FINALLY - unscrew the 4 torx screws holding the shifter assembly in place. Lift out the whole assembly ... you'll have to wiggle and twist and turn and swear at it, but it does come out WITHOUT USING MUCH FORCE. Sit in the driver's seat and invert the assembly onto your right leg ... now tease out the wire harness that leads from the shifter assembly to the green plug - and make note of how the harness is routed. The old shifter assembly is now completely disconnected - I'm keeping mine, it's ugly but it does work -- just in case ...
INSTALLATION - with the new shifter assembly laying on its side on top of the hole where it will go, thread the green plug and wire into place, running the same way the old one came out. Insert the plug into the connector until you hear a soft click, and press this whole plug assembly back into place. Now wiggle the new shifter assembly into the hole - again, NOT MUCH FORCE IS NECESSARY -- and check that the four attachment points align with the screw holes. Screw the 4 torx screws back in tight.
IMPORTANT STEP - bring back the veneer floor panel, and set it roughly in place ... reconnect the START-STOP plug, start the engine and shift the new assembly into Neutral. Shut off the engine.
LINKAGE CONNECTION - from the passenger side, you can use the blade screwdriver as a lever to pry the linkage a bit forward or backward, and you can move the shift lever a bit, until the shifter assembly metal knob lines up with the black receptacle. Now use the screwdriver to push the receptacle onto the knob - it will snap into place.
REPLACE THE SIDE PANELS - start at the back (with the seats bent forward) and just press each one back in place ... the 3 screw holes on each panel should line right up. Replace the 3 torx screws on each side and tighten.
CLOSE IT UP - retrieve the veneer floor panel, reconnect the two button plugs, and ease the panel down roughly into place. I started at the back end - gently push straight down on the panel ON BOTH SIDES AT THE SAME TIME, and you'll hear clicks as each side snaps into place.
That's it ... I had not anticipated taking off the two side panels, and I had not anticipated the linkage connection - but neither proved to be a problem. As I said - less than an hour start to finish, and that hour included at least 20 minutes education and "figure out how to do it" time ... I could probably do it again in 30 minutes or so.
I'm sorry I didn't take pictures as I did this, but it's pretty straight forward ... and I'm taking my wife out to a really nice dinner (or three) with the $200 I saved on parts (I bought the new shifter assembly online for $350) and labor ... and boy is the new shifter nice 'n pretty ...!!!

Joined: Dec 2011
Posts: 120,439
Likes: 17,006
From: Durham, UK
S-U-C-C-E-S-S ...!!!
It took me just under an hour, from starting the car and backing it out of the garage, to shutting it off after pulling it back in. The project was a bit tougher than expected, but easier than I was afraid it might be .....
...... I'm sorry I didn't take pictures as I did this, but it's pretty straight forward ...
https://www.jaguarforums.com/forum/x...k-links-20091/
I did take photos as I switched my veneer set so this one helps to illustrate your procedure:

Taken before I cleaned out the PO's crumbs!
Graham

Veteran Member
Joined: May 2010
Posts: 6,290
Likes: 485
From: Arlington, VA USA
S-U-C-C-E-S-S ...!!!
It took me just under an hour, from starting the car and backing it out of the garage, to shutting it off after pulling it back in. The project was a bit tougher than expected, but easier than I was afraid it might be ...
The surprises ...
1. you need a T30 torx driver (I had one - and found it!!!);
2. you'll need to take off the black plastic upper trim panels on both sides of the center console; and
3. the shifter assembly has not only the plug connector, it also has a physical linkage connection on the passenger side.
IMPORTANT: start the engine, shift into Neutral and shut off the engine -- the nagging bing-bing-bing will stop in 10 or 15 seconds ...
FIRST - my shifter knob just unscrewed - but check yours for any hex screws or other attachment method, which is more likely if you have changed your shifter knob or are working on a different model year than mine (2007 XK Coupe). Now pry the veneer wood panel straight up using a plastic tool ... I started at the ashtray on the passenger side, along the outside of the veneer panel, and worked my way rearward prying up all 4 clips along the right side, raising the panel just enough to free the clips (about an inch). Pry straight up -- then repeat on the driver's side from front to back. The back end of the panel now lifts up so you can reach forward to disconnect the 2 plugs at the front end of the panel - they each pull straight down, out of the female connector. Set the veneer floor panel aside.
NEXT - unscrew all 6 torx screws holding the long narrow black plastic decorative side panels in place - there are 3 screws along each side. Use a plastic tool or your fingers to pull off the two panels - there are a half-dozen or so clips on each one, just pry (or pull) straight out. The front end of each panel will bend in an outward direction into the knee well far enough to be able to get them out completely - I found it easier to fold the seat forward which let me get at the back end of each panel to release it.
NOW - on the passenger side of the assembly, sitting in the passenger seat, look straight down, about at the middle of the shifter assembly - you'll see a shiny metal knob sticking straight out from the assembly - this knob inserts into a black front-back linkage. I slipped a large blade screwdriver straight down from above to wedge the linkage off the knob - it pops off straight off toward the seat. Look at the passenger side of the new assembly - this will make a lot more sense seeing it.
ONE MORE STEP - on the driver's side, behind the black plastic decorative panel you removed, look for a green plug assembly just rearward of the assembly itself - this is where the shifter assembly connects to the car. The entire block (the plug and connector) can be pried out toward the door - I used that same large blade screwdriver to do it. Look at the new assembly plug and you'll discover how it disconnects from the car - now disconnect the old shifter assembly plug from the connector.
FINALLY - unscrew the 4 torx screws holding the shifter assembly in place. Lift out the whole assembly ... you'll have to wiggle and twist and turn and swear at it, but it does come out WITHOUT USING MUCH FORCE. Sit in the driver's seat and invert the assembly onto your right leg ... now tease out the wire harness that leads from the shifter assembly to the green plug - and make note of how the harness is routed. The old shifter assembly is now completely disconnected - I'm keeping mine, it's ugly but it does work -- just in case ...
INSTALLATION - with the new shifter assembly laying on its side on top of the hole where it will go, thread the green plug and wire into place, running the same way the old one came out. Insert the plug into the connector until you hear a soft click, and press this whole plug assembly back into place. Now wiggle the new shifter assembly into the hole - again, NOT MUCH FORCE IS NECESSARY -- and check that the four attachment points align with the screw holes. Screw the 4 torx screws back in tight.
IMPORTANT STEP - bring back the veneer floor panel, and set it roughly in place ... reconnect the START-STOP plug, start the engine and shift the new assembly into Neutral. Shut off the engine.
LINKAGE CONNECTION - from the passenger side, you can use the blade screwdriver as a lever to pry the linkage a bit forward or backward, and you can move the shift lever a bit, until the shifter assembly metal knob lines up with the black receptacle. Now use the screwdriver to push the receptacle onto the knob - it will snap into place.
REPLACE THE SIDE PANELS - start at the back (with the seats bent forward) and just press each one back in place ... the 3 screw holes on each panel should line right up. Replace the 3 torx screws on each side and tighten.
CLOSE IT UP - retrieve the veneer floor panel, reconnect the two button plugs, and ease the panel down roughly into place. I started at the back end - gently push straight down on the panel ON BOTH SIDES AT THE SAME TIME, and you'll hear clicks as each side snaps into place.
That's it ... I had not anticipated taking off the two side panels, and I had not anticipated the linkage connection - but neither proved to be a problem. As I said - less than an hour start to finish, and that hour included at least 20 minutes education and "figure out how to do it" time ... I could probably do it again in 30 minutes or so.
I'm sorry I didn't take pictures as I did this, but it's pretty straight forward ... and I'm taking my wife out to a really nice dinner (or three) with the $200 I saved on parts (I bought the new shifter assembly online for $350) and labor ... and boy is the new shifter nice 'n pretty ...!!!

Thread
Thread Starter
Forum
Replies
Last Post
neruda
S-Type / S type R Supercharged V8 ( X200 )
6
Oct 18, 2015 01:19 PM
FS[Western US]: Jaguar xk accessories for sale
jfitzoz
PRIVATE For Sale / Trade or Buy Classifieds
0
Sep 7, 2015 04:28 AM
Currently Active Users Viewing This Thread: 1 (0 members and 1 guests)