When you click on links to various merchants on this site and make a purchase, this can result in this site earning a commission. Affiliate programs and affiliations include, but are not limited to, the eBay Partner Network.
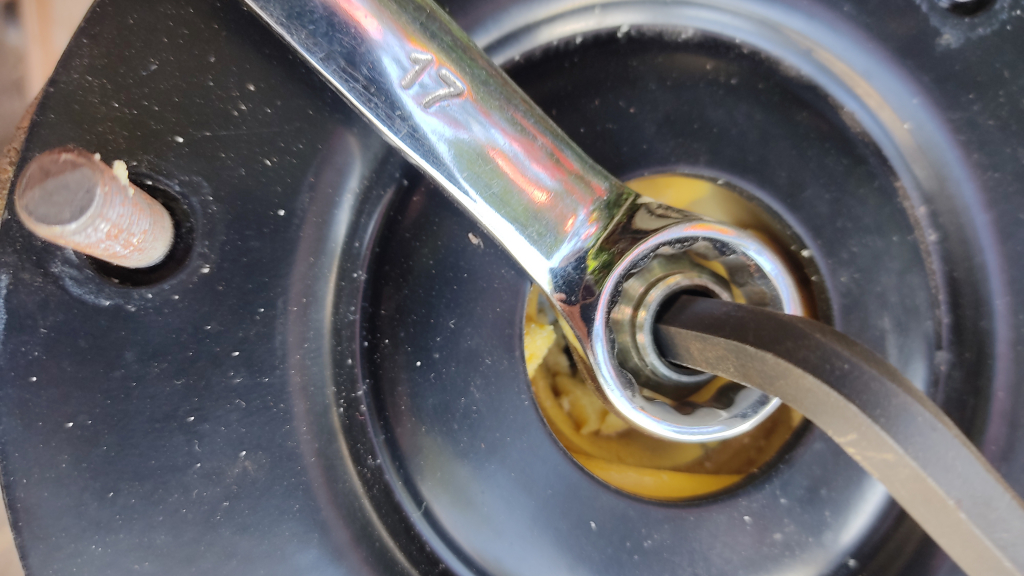
Ok, I'm stumped. How do you remove the shock mount from a CATS strut after the spring has been compressed? I figured it was as easy as removing the nut in the center, but it just spins (with some resistance).
Didn't find anything on it in the shop manual and all the videos I've come across are for non-CATS.
Hoping for advice, thanks!
my fingers were never meant to type on an iPhone 13 mini. Not to mention old eyes that have seen too much, and missed seeing even more.
happy Thanksgiving to all that celebrate it,
Z
PS
days ago marks the 9th or 10th consecutive time I�ve been filling up the gas tank on the XKR, only to have the complete stranger walk up and tell me how great the car looks. Can�t argue with that
PPS: all this time I�ve thought the car was infested with gremlins. Only to find out it was alien heads causing all the mischief.
I believe I saw a warning about not allowing the shaft of the shock to rotate as it may damage the electrical connection.
Yup, I realized this may be the case after the fact, though I haven't actually seen it as a stated warning anywhere. So did I just ruin a +$400 shock, meaning I need to buy two new ones? Actually, if the resistance over the pins reads about 6 ohms, it should still be ok, correct? Going to check when I'm back at it, will report back.
Man, those pins in the shock shaft are not easy to get probes on!
Ended up bending the probe tips some to be able to hold them steady on the pins.
Good news though, the resistance reads 5.7 ohms, so I think I'm in the clear (?)
Yup, I realized this may be the case after the fact, though I haven't actually seen it as a stated warning anywhere. So did I just ruin a +$400 shock, meaning I need to buy two new ones? Actually, if the resistance over the pins reads about 6 ohms, it should still be ok, correct? Going to check when I'm back at it, will report back.
It will not hurt them, the valve is captive on the operating rod and rotates with it. Had to rotate them deliberately on occasion to orient pins with no ill effect.
I'm in the process of doing this now. Does anyone know what size alien key is needed? My metric ones are too small for that size, but I have a 5/16 that seems to fit loosely - is that going to be good enough?
I'm in the process of doing this now. Does anyone know what size alien key is needed? My metric ones are too small for that size, but I have a 5/16 that seems to fit loosely - is that going to be good enough?
I love that hex keys are now officially named alien keys on this forum!
I just checked mine, it's 8mm so your 5/16 is just a tad smaller, but I don't think I would risk it since it's not something you can stand to have stripped.
I love that hex keys are now officially named alien keys on this forum!
I just checked mine, it's 8mm so your 5/16 is just a tad smaller, but I don't think I would risk it since it's not something you can stand to have stripped.
Great. Thanks for that, I do like an excuse to buy more tools.
Great. Thanks for that, I do like an excuse to buy more tools.
Yup, and this front suspension project has been very good to me in that respect. I already had a decent collection of tools prior, but had to add a bunch anyway. So far, I've bought:
- Two ball joint presses (the first worked for the upper wishbone joint but was too big for the tie-rod one)
- A spring compressor set
- A bearing/bushing press set
- A large metric wrench set (really only needed to add a 22mm and a 24mm, but was only $20 at Harbor Freight for the whole set)
- Socket extension sets with locking mechanism (for getting to the stabilizer bar bushing bracket screws)
- Several deep impact-rated sockets
- An 18V cordless impact wrench
- A bottle jack
- Two vise-grips
Still need to pick up a small torque wrench and probably a 22mm crow-foot wrench for torqueing the tie-rod jam nut.
I'm redoing the front suspension upper shock mounts, so your post was very timely. I say redoing, because the first time I did it was 5 years ago. This time round I am using a set of mounts from Baxtor, which look a lot better designed than the ones I used last time. I am also changing various bushes (again) while the suspension is in pieces. Hopefully this time the shock mounts will last longer than 5 years as it is a real PITA getting the shock tower out.
Other jobs on the list for the winter include replacing the hydraulic hoses for the roof and finally getting round to fixing the cloudy rear view mirror.
Nice, are you planning to replace the lower control arm bushings by any chance?
I've looked for a video showing how to deal with the steering rack and oil cooler lines to get at the bolts, but haven't found one. I have Powerflex replacements on hand but won't tackle that job until I first understand the full procedure.
when I replaced mine, I don't remember any issue with the oil cooler lines and I had the inner tie rods removed for replacement but think if you just move the bellows out of the way, you would be ok. Also - a 33MM socket is the best fit to press out the old bushings!!!! They are a PITA and took quite a bit but once removed, the power flex went in nice and easy. Hopefully the lower ball joints are good as those were the BIGGEST PITA to press in new ones