When you click on links to various merchants on this site and make a purchase, this can result in this site earning a commission. Affiliate programs and affiliations include, but are not limited to, the eBay Partner Network.
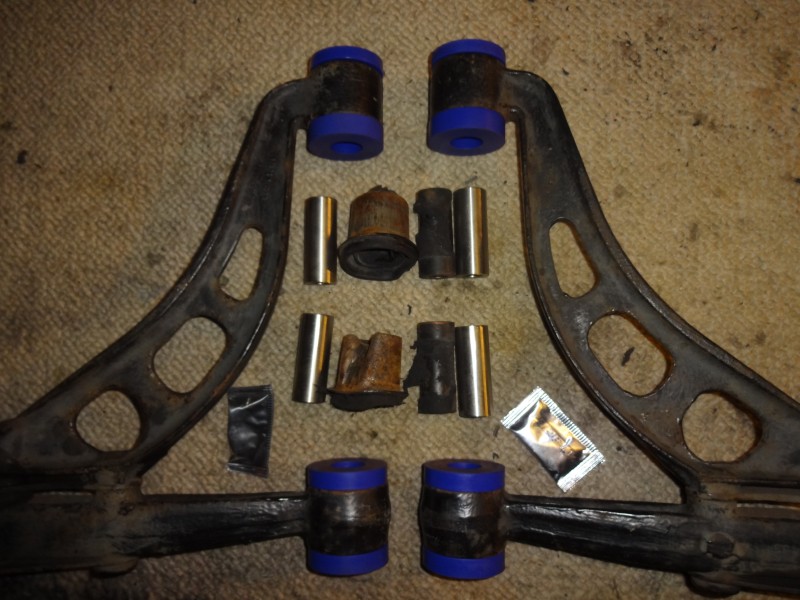
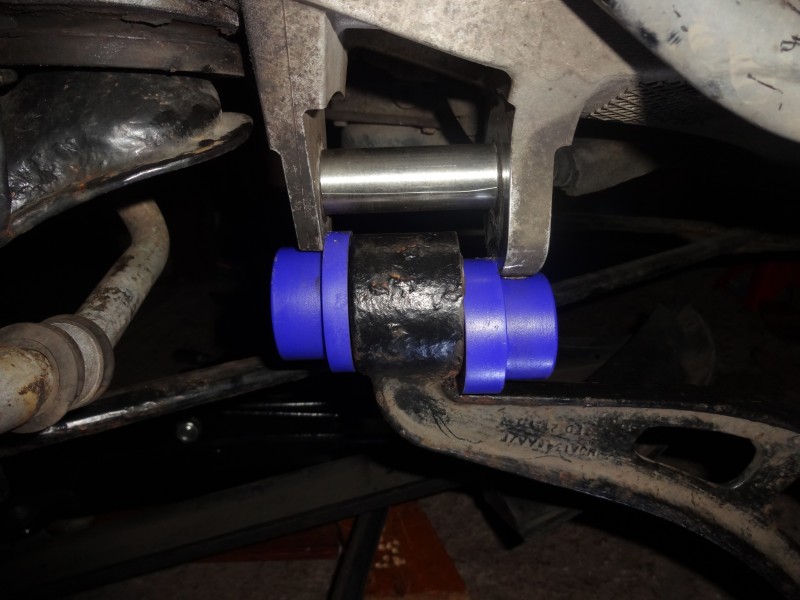
I'm in the process of replacing my upper and lower control arm bushings with Powerflex bushings and the uppers went in fine but the lowers were so tight I (regrettably ) used a floor jack to press the bushings into the subframe. I couldn't press the bushings far enough up now I can't get them out!
Any suggestions? I might try to melt it out as a last resort.
After and stuck! Before
As in all things in life if you have to force it somethings not right! But my now I'm sure you have realized that. Do you have a little no crow bar? If so try getting the crow foot between the frame and control arm and use the leverage to pry them loose.
I don't think the bushings are the problem, I think the sleeve in the middle of the bushings is what is hanging up......If you try to heat them or melt them, you may compound the problem, the fire danger notwithstanding. I suggest you get a "sawsall" with a metal cutting blade and cut the bushings right through the gut....it will be a sacrifice of the bushing but cheaper than damaging the lower strut or control arm....patience...don't just barrel in.
They are not usually that tight...tight but not to the extreme you have.....it will be fine if you "dry fit" new bushing sleeve prior to installation....some minor file work to the bush sleeve might be in order. Again, patience is the key.....you are not trying to break records, just learn, save money and be safe.
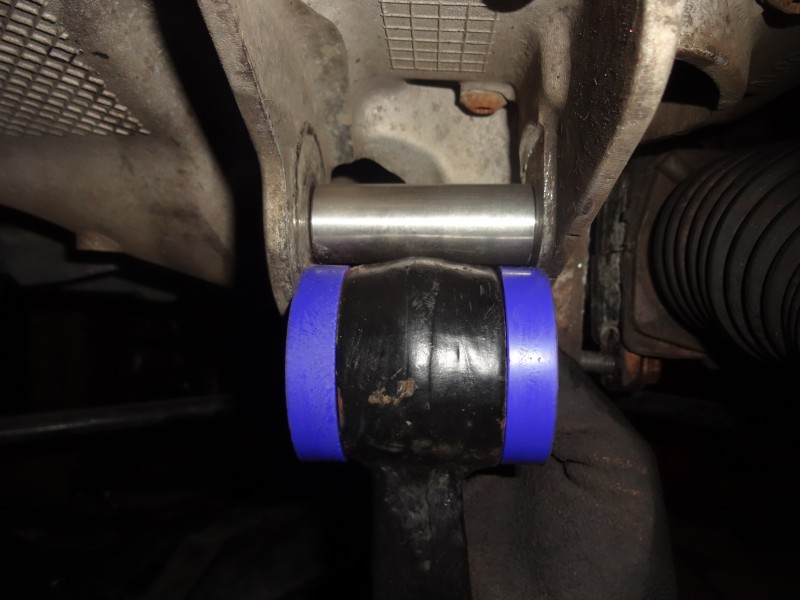
A large pry bar between the arm and the subframe should get it out. Once you get it out check the bush sleeve length against the originals.
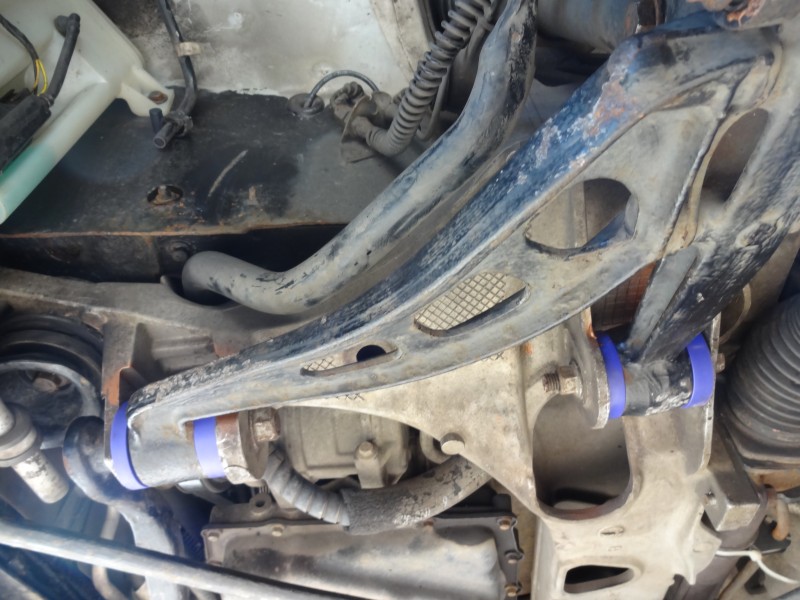
Fitting the arms with the new bushes was a very tight fit, it needed a trolley jack and bottle jack just to lever the two sides up (with both ends lubed with copper grease), then a lot of hammering to get the alignment perfect so that the bolts would go through unhindered.
The new bush metal inserts were the same length as the old ones, here is a comparison of new and old.
Test fitting to ensure the correct fitting of the thin and thick sides.
The total job took me about 8 hours for both sides.
At a guess you have put the thick and thin sides in the wrong way around. Easy to do. I did mine in a friends garage with him, and he is a professional. Had a put the bushes in the wrong way. I did point it out to him but he said it would not make any difference.. 2 hours later he was using the garage lift to try and press the bush back out again and turn it around.
We all live and learn. Bet you wont do it wrong again but good on you for trying it yourself in the first place.
I don't think the bushings are the problem, I think the sleeve in the middle of the bushings is what is hanging up......If you try to heat them or melt them, you may compound the problem, the fire danger notwithstanding. I suggest you get a "sawsall" with a metal cutting blade and cut the bushings right through the gut....it will be a sacrifice of the bushing but cheaper than damaging the lower strut or control arm....patience...don't just barrel in.
Thank, this was the problem as you suggested: the metal tube in the center was offset as it was lifted in the sub-frame. It took two of us with large pry bars to finally get it out and re-installed. I'm bracing myself for the other side!
A large pry bar between the arm and the subframe should get it out. Once you get it out check the bush sleeve length against the originals.
Fitting the arms with the new bushes was a very tight fit, it needed a trolley jack and bottle jack just to lever the two sides up (with both ends lubed with copper grease), then a lot of hammering to get the alignment perfect so that the bolts would go through unhindered.
The new bush metal inserts were the same length as the old ones, here is a comparison of new and old.
Test fitting to ensure the correct fitting of the thin and thick sides.
The total job took me about 8 hours for both sides.
Thank you for the input and photos! The problem was exactly as you suggested; the metal tube was canted when raised into the frame. Took two grown men with large pry bars to remove them but it all went back in with both of us alternating raising both ends of the arm into place at the same time.