
Rear (CATS) shock bush replacement - How to


Thread Starter
|
Veteran Member


Joined: Apr 2012
Posts: 1,854
Likes: 987
From: UK
I've had a knocking sound in the car since I bought it in March this year, my local indi showed me how to diagnose a problem with the shock bush and finally I got round to it today.
It was a real pain in the ... to do it, and took most of the day to complete the job.
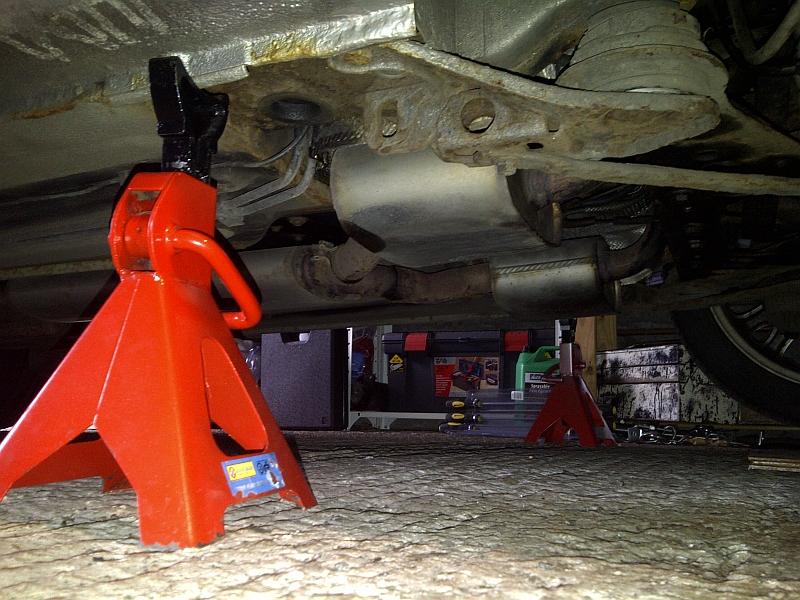
I jack the rear of the car here, betwwen the two bolts at the rear of the diff.

Jack stands here.
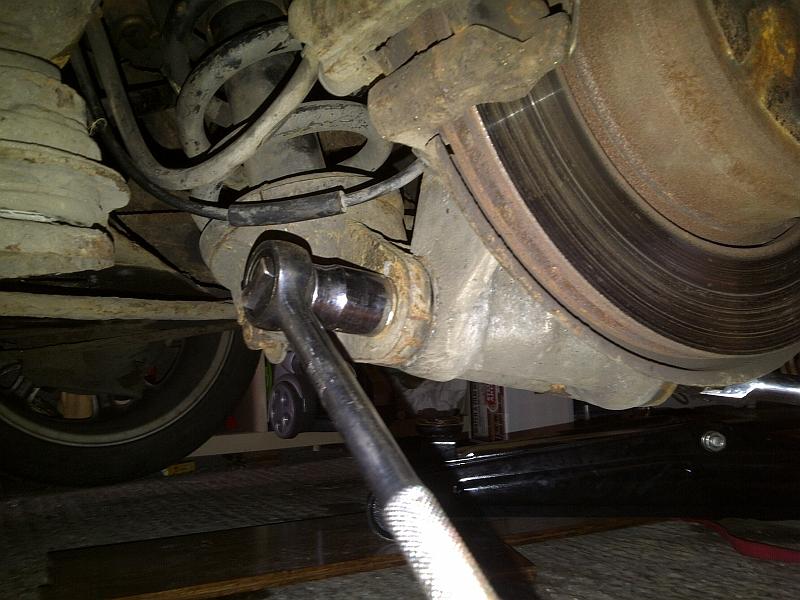
Next I removed the hub bearing bolt to get better access. I needed a breaker bar to get the nut off.
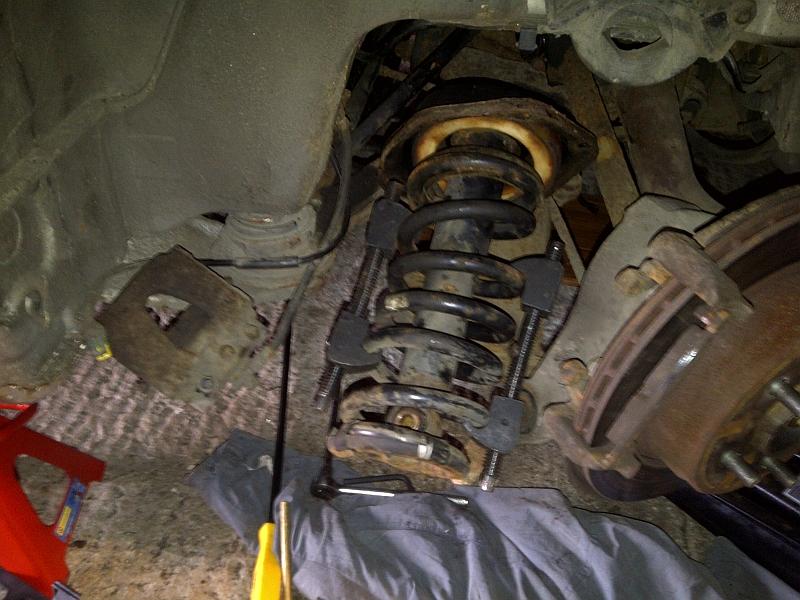
Next I jacked the suspension arm back up before putting on the spring compressors.
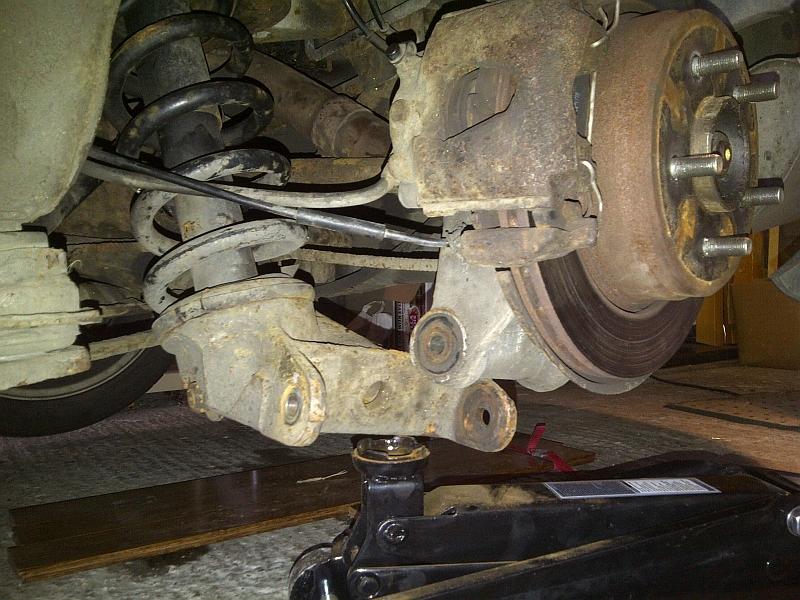
I used a pair of these.

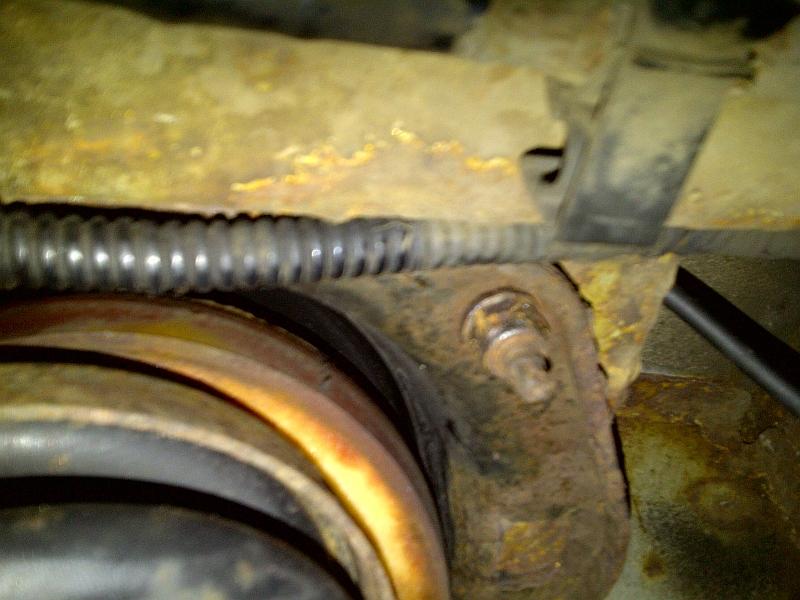
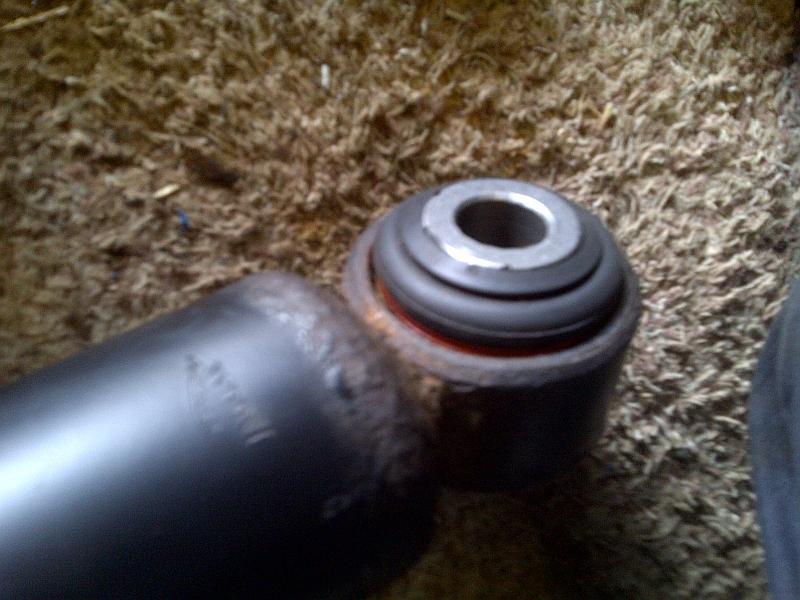
One on the front and one on the back, you can see the split in the bush rubber cover here.

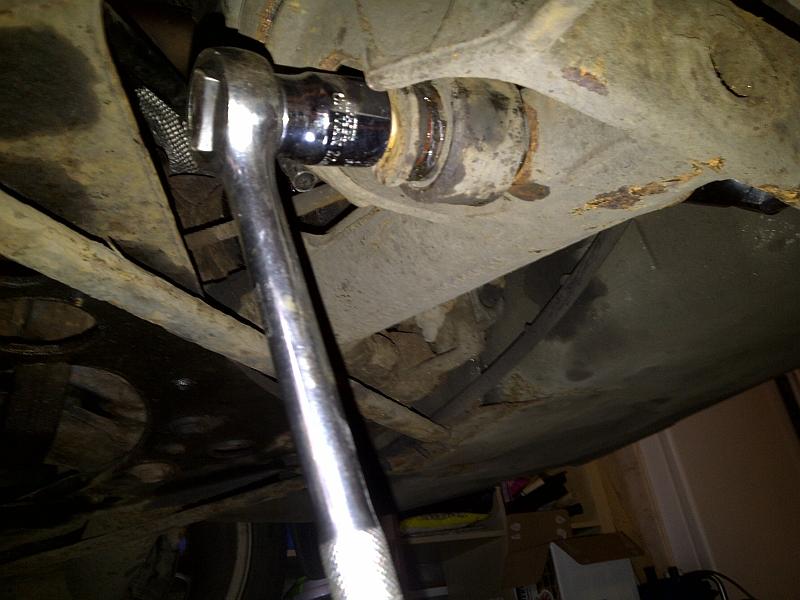
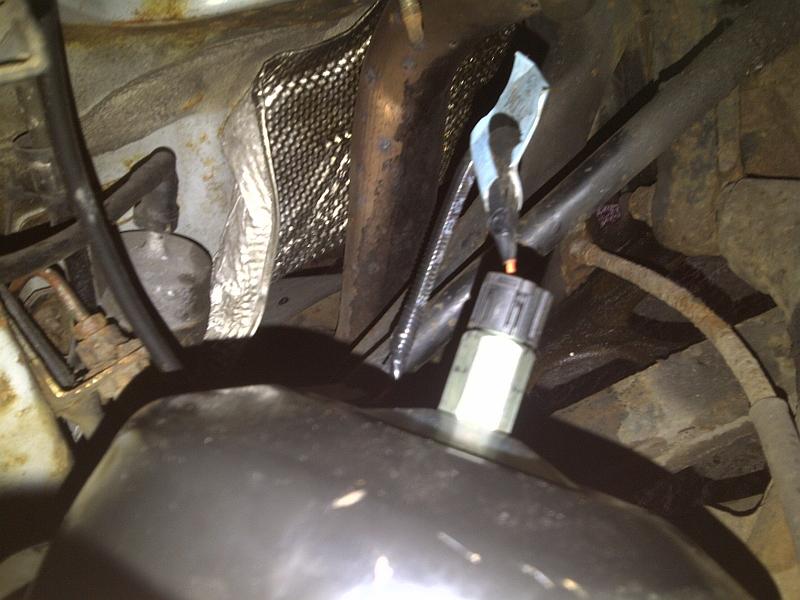
Nex the bolt in the holding the shock bush, again the breaker bar was needed.
Next I jacked up a bit of wook beneath the shock to compress it the held it in place with a small brass drift.

Next there are four nuts like this that need to come out.
Three came out with their studs, one came of clean, at least nothing sheared.

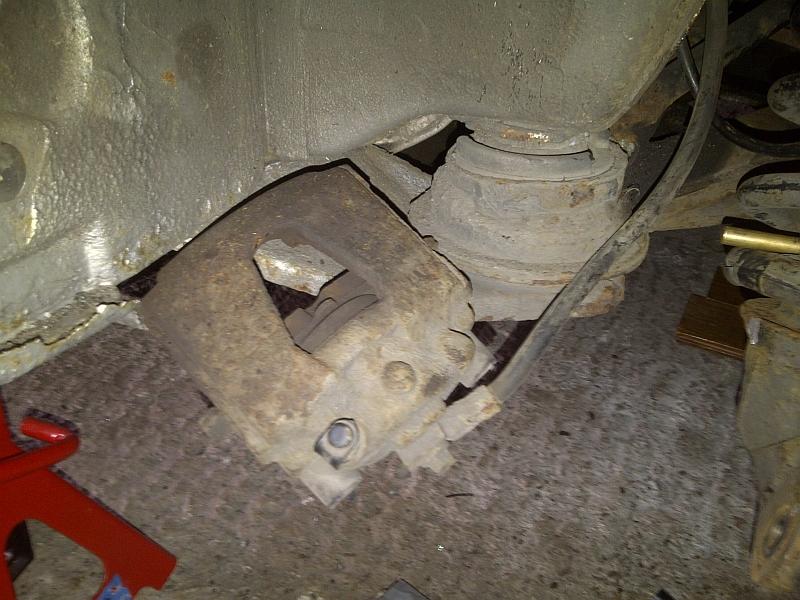
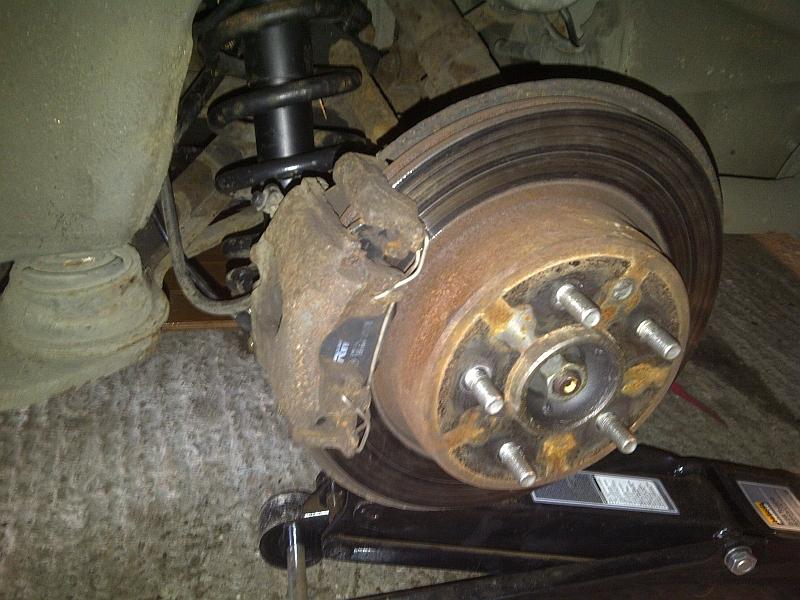
I also removed the outer part of the brake calliper to get more room.
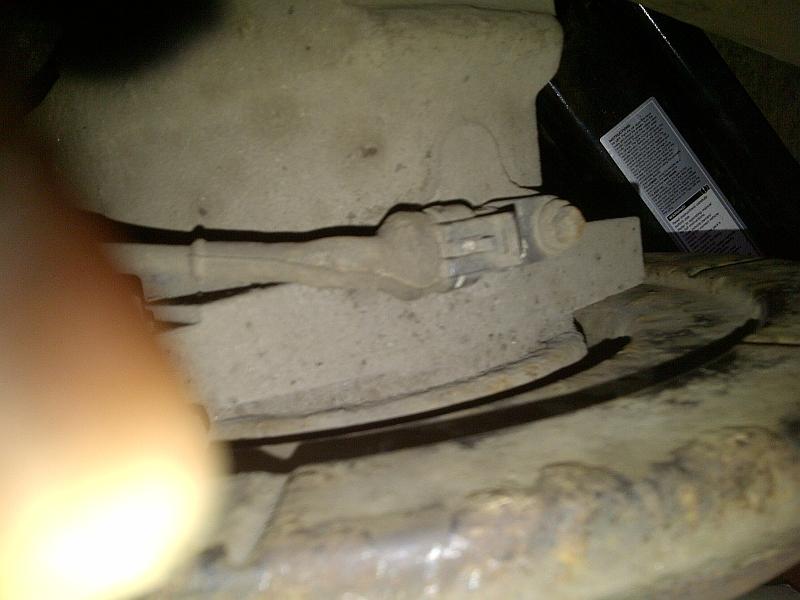
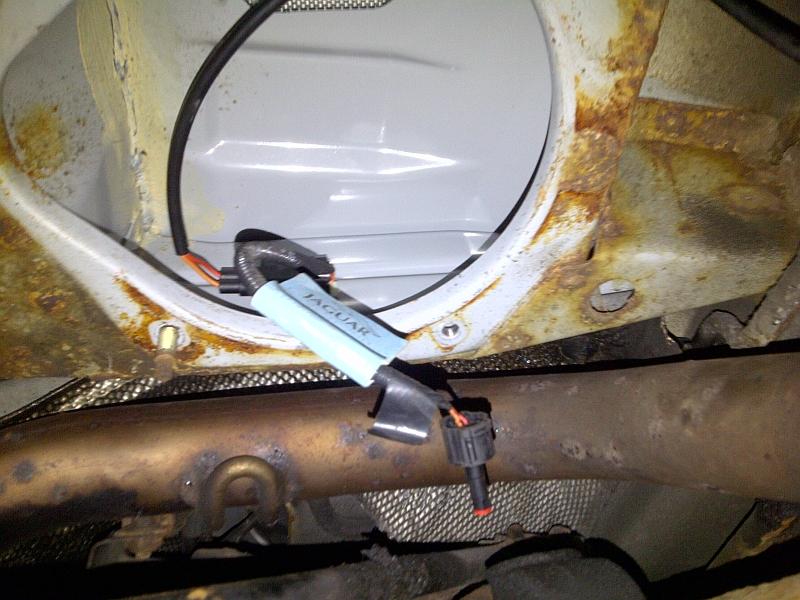
And this cable, I guess its the brake wear sensor.
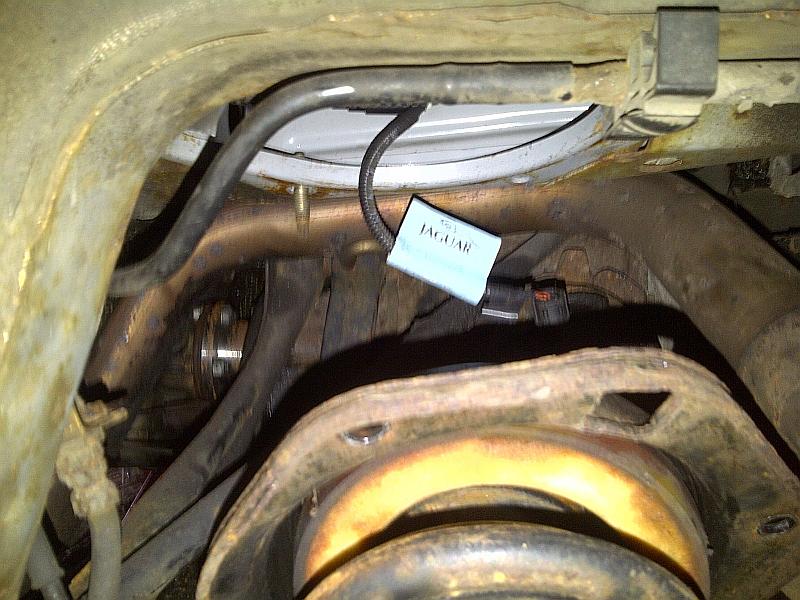
After wriggling the bottom free, I was able to drop ithe assembly by a few inches and then remove the cats connector on the top of the shock.
And finally the shock was out.
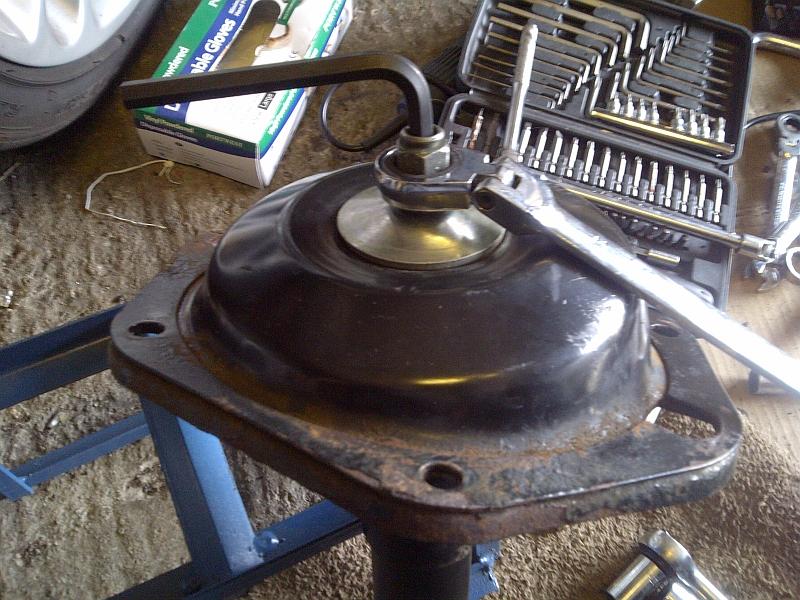
I removed the top mount like this, there is a recess for an allen key.
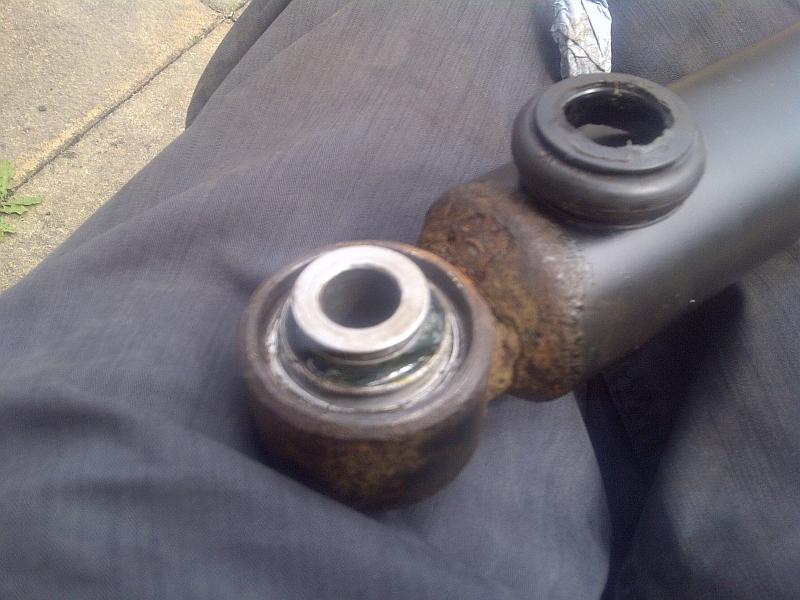
Next i set off to my local welder who I know has a press. he was easily able to press it out and press the new one in. We removed the rubber boot before pushing the new one in so as not to damage it. He also refused to take any payment. I told him I would be back to get the floor pans done.
Boot back on, its held in place by a couple of spring wires.
I then reassembled the assembly and reconnected the cats loom.
I kept the shock comressed with a bit of string.

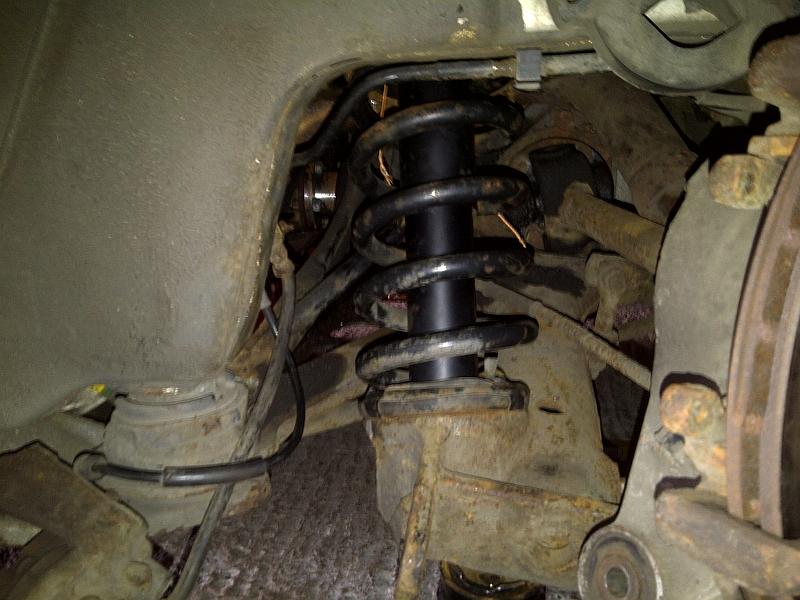
Finally it was all back in place.
Then the rest of the parts were reassembles in reverse order to disassembly.
Finally went for a test drive, fantastic, no more knocking!
It was a real pain in the ... to do it, and took most of the day to complete the job.
I jack the rear of the car here, betwwen the two bolts at the rear of the diff.
Jack stands here.
Next I removed the hub bearing bolt to get better access. I needed a breaker bar to get the nut off.
Next I jacked the suspension arm back up before putting on the spring compressors.
I used a pair of these.
One on the front and one on the back, you can see the split in the bush rubber cover here.
Nex the bolt in the holding the shock bush, again the breaker bar was needed.
Next I jacked up a bit of wook beneath the shock to compress it the held it in place with a small brass drift.
Next there are four nuts like this that need to come out.
Three came out with their studs, one came of clean, at least nothing sheared.
I also removed the outer part of the brake calliper to get more room.
And this cable, I guess its the brake wear sensor.
After wriggling the bottom free, I was able to drop ithe assembly by a few inches and then remove the cats connector on the top of the shock.
And finally the shock was out.
I removed the top mount like this, there is a recess for an allen key.
Next i set off to my local welder who I know has a press. he was easily able to press it out and press the new one in. We removed the rubber boot before pushing the new one in so as not to damage it. He also refused to take any payment. I told him I would be back to get the floor pans done.
Boot back on, its held in place by a couple of spring wires.
I then reassembled the assembly and reconnected the cats loom.
I kept the shock comressed with a bit of string.
Finally it was all back in place.
Then the rest of the parts were reassembles in reverse order to disassembly.
Finally went for a test drive, fantastic, no more knocking!
Thread Starter
|
Veteran Member
Joined: Apr 2012
Posts: 1,854
Likes: 987
From: UK
Yes, I saw the other post on how to do it with a home made tool but decided to pull it out and find a friendly garage with a press.

Veteran Member
Joined: Dec 2011
Posts: 6,278
Likes: 690
From: Limousin, France
No,there's no fault message.
If you're doing this you MUST press the bush in by applying force to the outside.
If you press it in with the centre part (where the bolt goes) you risk damaging it.
If you're doing this you MUST press the bush in by applying force to the outside.
If you press it in with the centre part (where the bolt goes) you risk damaging it.

Senior Member
Joined: Nov 2011
Posts: 198
Likes: 47
From: MD
I plan on doing one of these myself this upcoming weekend. I plan on doing it under the car as others have. My questions is can I do this without spring compressors, or do I absolutely need them? Thanks.
Veteran Member
Joined: Dec 2011
Posts: 6,278
Likes: 690
From: Limousin, France
I reckon two bags of cement in the boot would do just as well.
Here's a link with drawings of the tools I made.
You will need tools.
https://www.jaguarforums.com/forum/x...-update-69706/
Here's a link with drawings of the tools I made.
You will need tools.
https://www.jaguarforums.com/forum/x...-update-69706/
Trending Topics
Senior Member
Joined: Nov 2011
Posts: 198
Likes: 47
From: MD
I completed swapping out the left lower rear shock bushing. I did it under the car. It did not go nearly as smooth as I would have expected. I was able to do it with sockets, washers, nuts, and bolts; but it would have been much easier with a custom-type tool as noted in many posts.
Anyways, here are the lessons learned that hopefully others can learn from that were not clear to me until doing it:
1. I removed the bearing with a socket, bolts, and washers. The washers made contact with the smaller cylindrical portion of the bearing, then pushed that flush with the larger cylindrical portion of the bearing, then removed the whole thing. Once this bearing is removed it will be no good, but most people probably plan on throwing it away anyways.
2. Spring compressors. I owned a heavy duty pair, but they were no good because they would not fit in the small spaces of the XKR coil springs. I bought another pair that barely fit. I could only compress the spring until the top of the spring compressor bolts were touching the car body. So get tiny, small, old style spring compressors that don't have any of the newer safety pins / stuff on them.
3. Once compressed, I could only really work on one side of the shock bearing. On the opposite side, there was only enough room for really a bolt and wrench....no way to put a socket sized item on both sides. This is what complicated things for me. I did manage to press the new bearing in with a socket from my 3/4" drive set. (Important....when you press the new bearing in, you must press it in using force on the larger, and more inward, cylindrical portion). I did not have to remove the rubber seals or spring, and they were not damaged at all during insertion. I also wasn't sure how to remove them without damage.
4. Unfortunately, I was not able to center the new bearing inside the center of the shock bearing holder. This is because the socket I used to press it in was fat, the one side of the new bearing is flush with the edge of the shock bearing holder. I personally don't see any issues or concerns with this, but it bothers me that I couldn't get it centered how it should be.
5. This one should be first. When you remove the hub bearing bolt, on the bolt side, pay attention and mark which direction the line / arrow is on the bolt (ie your rear alignment).
6. In hindsight, I would have removed the shock completely, then pressed the bearing out and in. This is because I could not get room on both sides of the shock under the car. However, if with another pair of spring compressors I could have gotten the needed space, then I would do it under the car.
That's all folks.

Junior Member
Joined: Oct 2012
Posts: 2
Likes: 1
From: U.k
Thanks, great pictures just done my bush sorry bearing! Was a doddle the hardest part was getting the old bearing out, pair of sockets was all I used and the vice, oh yes and a long pipe!! Easy to get at just follow instructions I I took the rubber sleeves off new bearing and it took ages to get the clips back on but worthwhile doing. One tip cut the old bearing out out of its sleeve and clean it up then use that to knock the new bearing in squarely using a vice was fine and its such a tight fit it guides in fairly easily. Thanks for the photos again made it so much easier to understand!
Guitarman944
Guitarman944
I've had a knocking sound in the car since I bought it in March this year, my local indi showed me how to diagnose a problem with the shock bush and finally I got round to it today.
It was a real pain in the ... to do it, and took most of the day to complete the job.
I jack the rear of the car here, betwwen the two bolts at the rear of the diff.
Jack stands here.
Next I removed the hub bearing bolt to get better access. I needed a breaker bar to get the nut off.
Next I jacked the suspension arm back up before putting on the spring compressors.
I used a pair of these.
One on the front and one on the back, you can see the split in the bush rubber cover here.
Nex the bolt in the holding the shock bush, again the breaker bar was needed.
Next I jacked up a bit of wook beneath the shock to compress it the held it in place with a small brass drift.
Next there are four nuts like this that need to come out.
Three came out with their studs, one came of clean, at least nothing sheared.
I also removed the outer part of the brake calliper to get more room.
And this cable, I guess its the brake wear sensor.
After wriggling the bottom free, I was able to drop ithe assembly by a few inches and then remove the cats connector on the top of the shock.
And finally the shock was out.
I removed the top mount like this, there is a recess for an allen key.
Next i set off to my local welder who I know has a press. he was easily able to press it out and press the new one in. We removed the rubber boot before pushing the new one in so as not to damage it. He also refused to take any payment. I told him I would be back to get the floor pans done.
Boot back on, its held in place by a couple of spring wires.
I then reassembled the assembly and reconnected the cats loom.
I kept the shock comressed with a bit of string.
Finally it was all back in place.
Then the rest of the parts were reassembles in reverse order to disassembly.
Finally went for a test drive, fantastic, no more knocking!

Thread Starter
|
Veteran Member
Joined: Apr 2012
Posts: 1,854
Likes: 987
From: UK
I was just replacing the bushes so the only difference was no more knocking. If I had to change the shocks I think I would go for non CATS as this car never gets driven hard by my wife and I doubt she would know the difference.

Junior Member
Joined: Jan 2022
Posts: 1
Likes: 0
Any idea where I can get a pair of that design of spring compressor, or somebody who sells an equivalent? I have tried two loaners from auto parts stores and they don't work due to being too long.
2004 XK8 116,293 miles
2004 XK8 116,293 miles
Veteran Member
Joined: Dec 2011
Posts: 2,941
Likes: 1,582
From: Spencer, NC
We cut a small size pair to the length we felt would give the clearance we needed.
If you work on these car for very long, you will have a drawer full of tools that didn't fit until you applied the cutting wheel or such.
If you work on these car for very long, you will have a drawer full of tools that didn't fit until you applied the cutting wheel or such.
Veteran Member
Joined: Oct 2012
Posts: 3,786
Likes: 1,673
From: Puerto Rico
You don't need spring compressors for the rear shocks. It's much easier if you lift the car high enough and unbolt the metal plate beneath the differential than use a large crowbar to bend down the ever living hell out of that plate. That will allow the control arms to extend lower and you can remove the shocks and springs afterwards without having to compress the springs. I like using a cinder block to keep the crowbar in its position while I finagle the rear shock and spring assembly out.

Thread
Thread Starter
Forum
Replies
Last Post
BrentGardner
XJ XJ6 / XJ8 / XJR ( X350 & X358 )
29
Dec 16, 2024 12:13 AM
Fraser Mitchell
XJ XJ6 / XJ8 / XJR ( X350 & X358 )
9
Oct 1, 2015 04:06 AM
Doug Dooren
XJ XJ8 / XJR ( X308 )
0
Aug 30, 2015 08:51 AM
Currently Active Users Viewing This Thread: 1 (0 members and 1 guests)