When you click on links to various merchants on this site and make a purchase, this can result in this site earning a commission. Affiliate programs and affiliations include, but are not limited to, the eBay Partner Network.
When I first bought my car, the fuel pumps had an issue of not transferring fuel from one side of the tank to the other. I knew sooner or later I would have to do something about the problem, but this involved removing the pumps and I kept baulking at the idea. My hesitation stemmed from most people's suggestion that you use a drift (or flat-bladed screwdriver) and a mallet to loosen the plastic retaining rings by driving against the flanges.
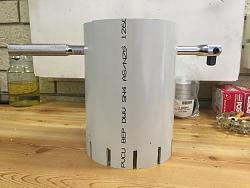
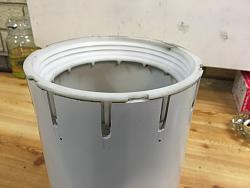
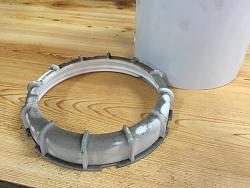
Twelve months later my hand was forced when the car failed to proceed 1000 km from home (20 psi fuel pressure at anything above idle). I decided to bite the bullet and make myself a removal tool. Fortuitously the internal diameter of 'six inch' sewer pipe is the same as the diameter of the fuel pump retaining rings (~154 mm), so I thought this was a good place to start. My idea was to cut 12 slots into the pipe to mate with the flanges on the rings. I have attached a series of photos below to illustrate the sequence of constructing my removal tool. I used a set of dividers to mark my pipe into twelve equal intervals (41.4 mm in the case of my pipe) and then I cut 4 mm wide slots to a depth of 27 mm. Add a hole to insert a bar and the job was done. The tool worked a treat and I still have 12 flanges on my retaining rings! One thing I found was it was useful to spray the threads on the rings with ezy-glide when reassembling them. They seemed to bind a bit otherwise.
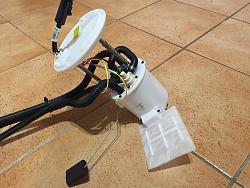
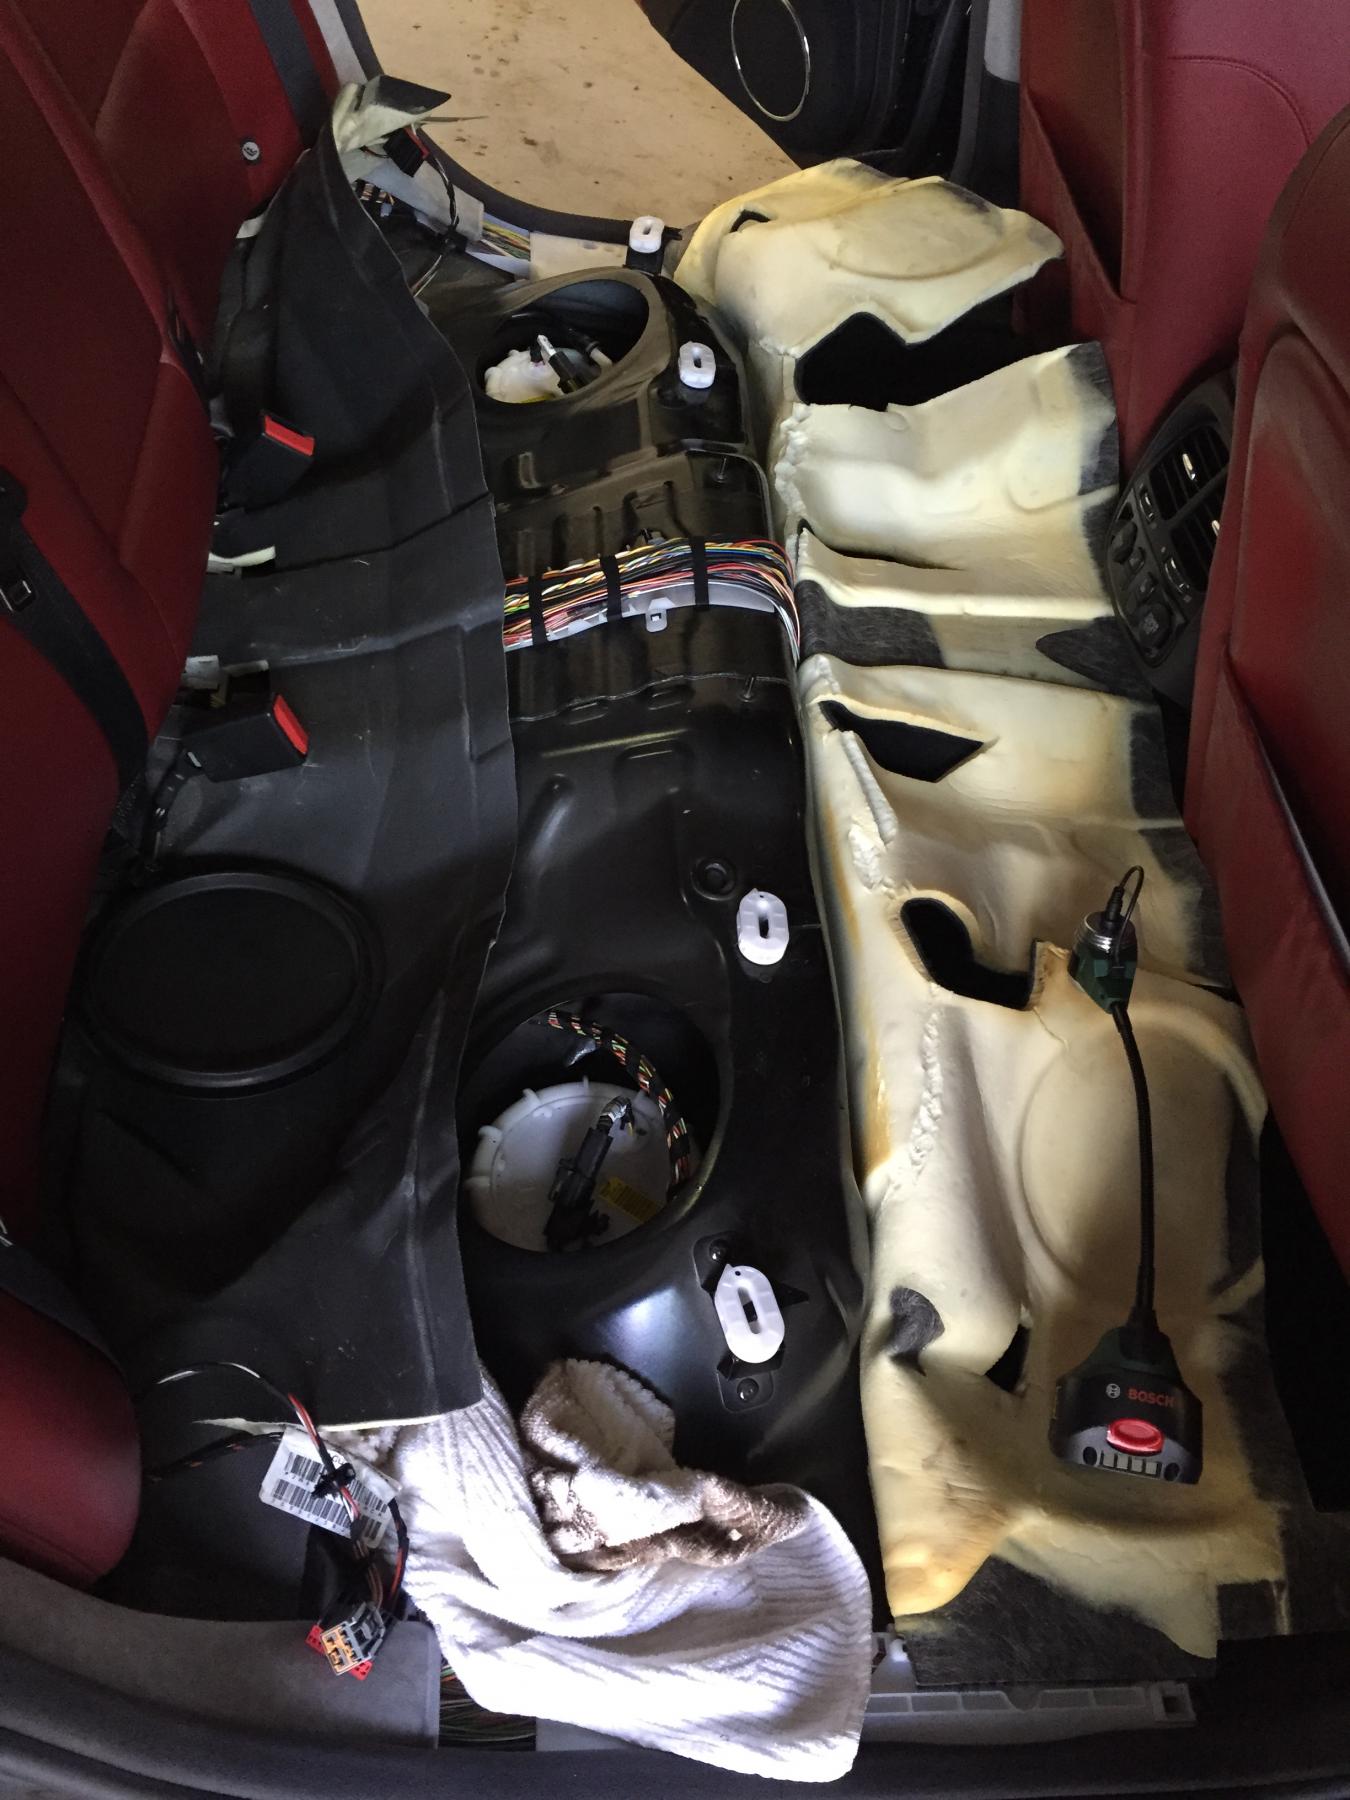
While this is a post about making a removal tool, I thought I would pass on some information on what I found once I removed the two pumps (left hand side jet pump and right side electric pump).
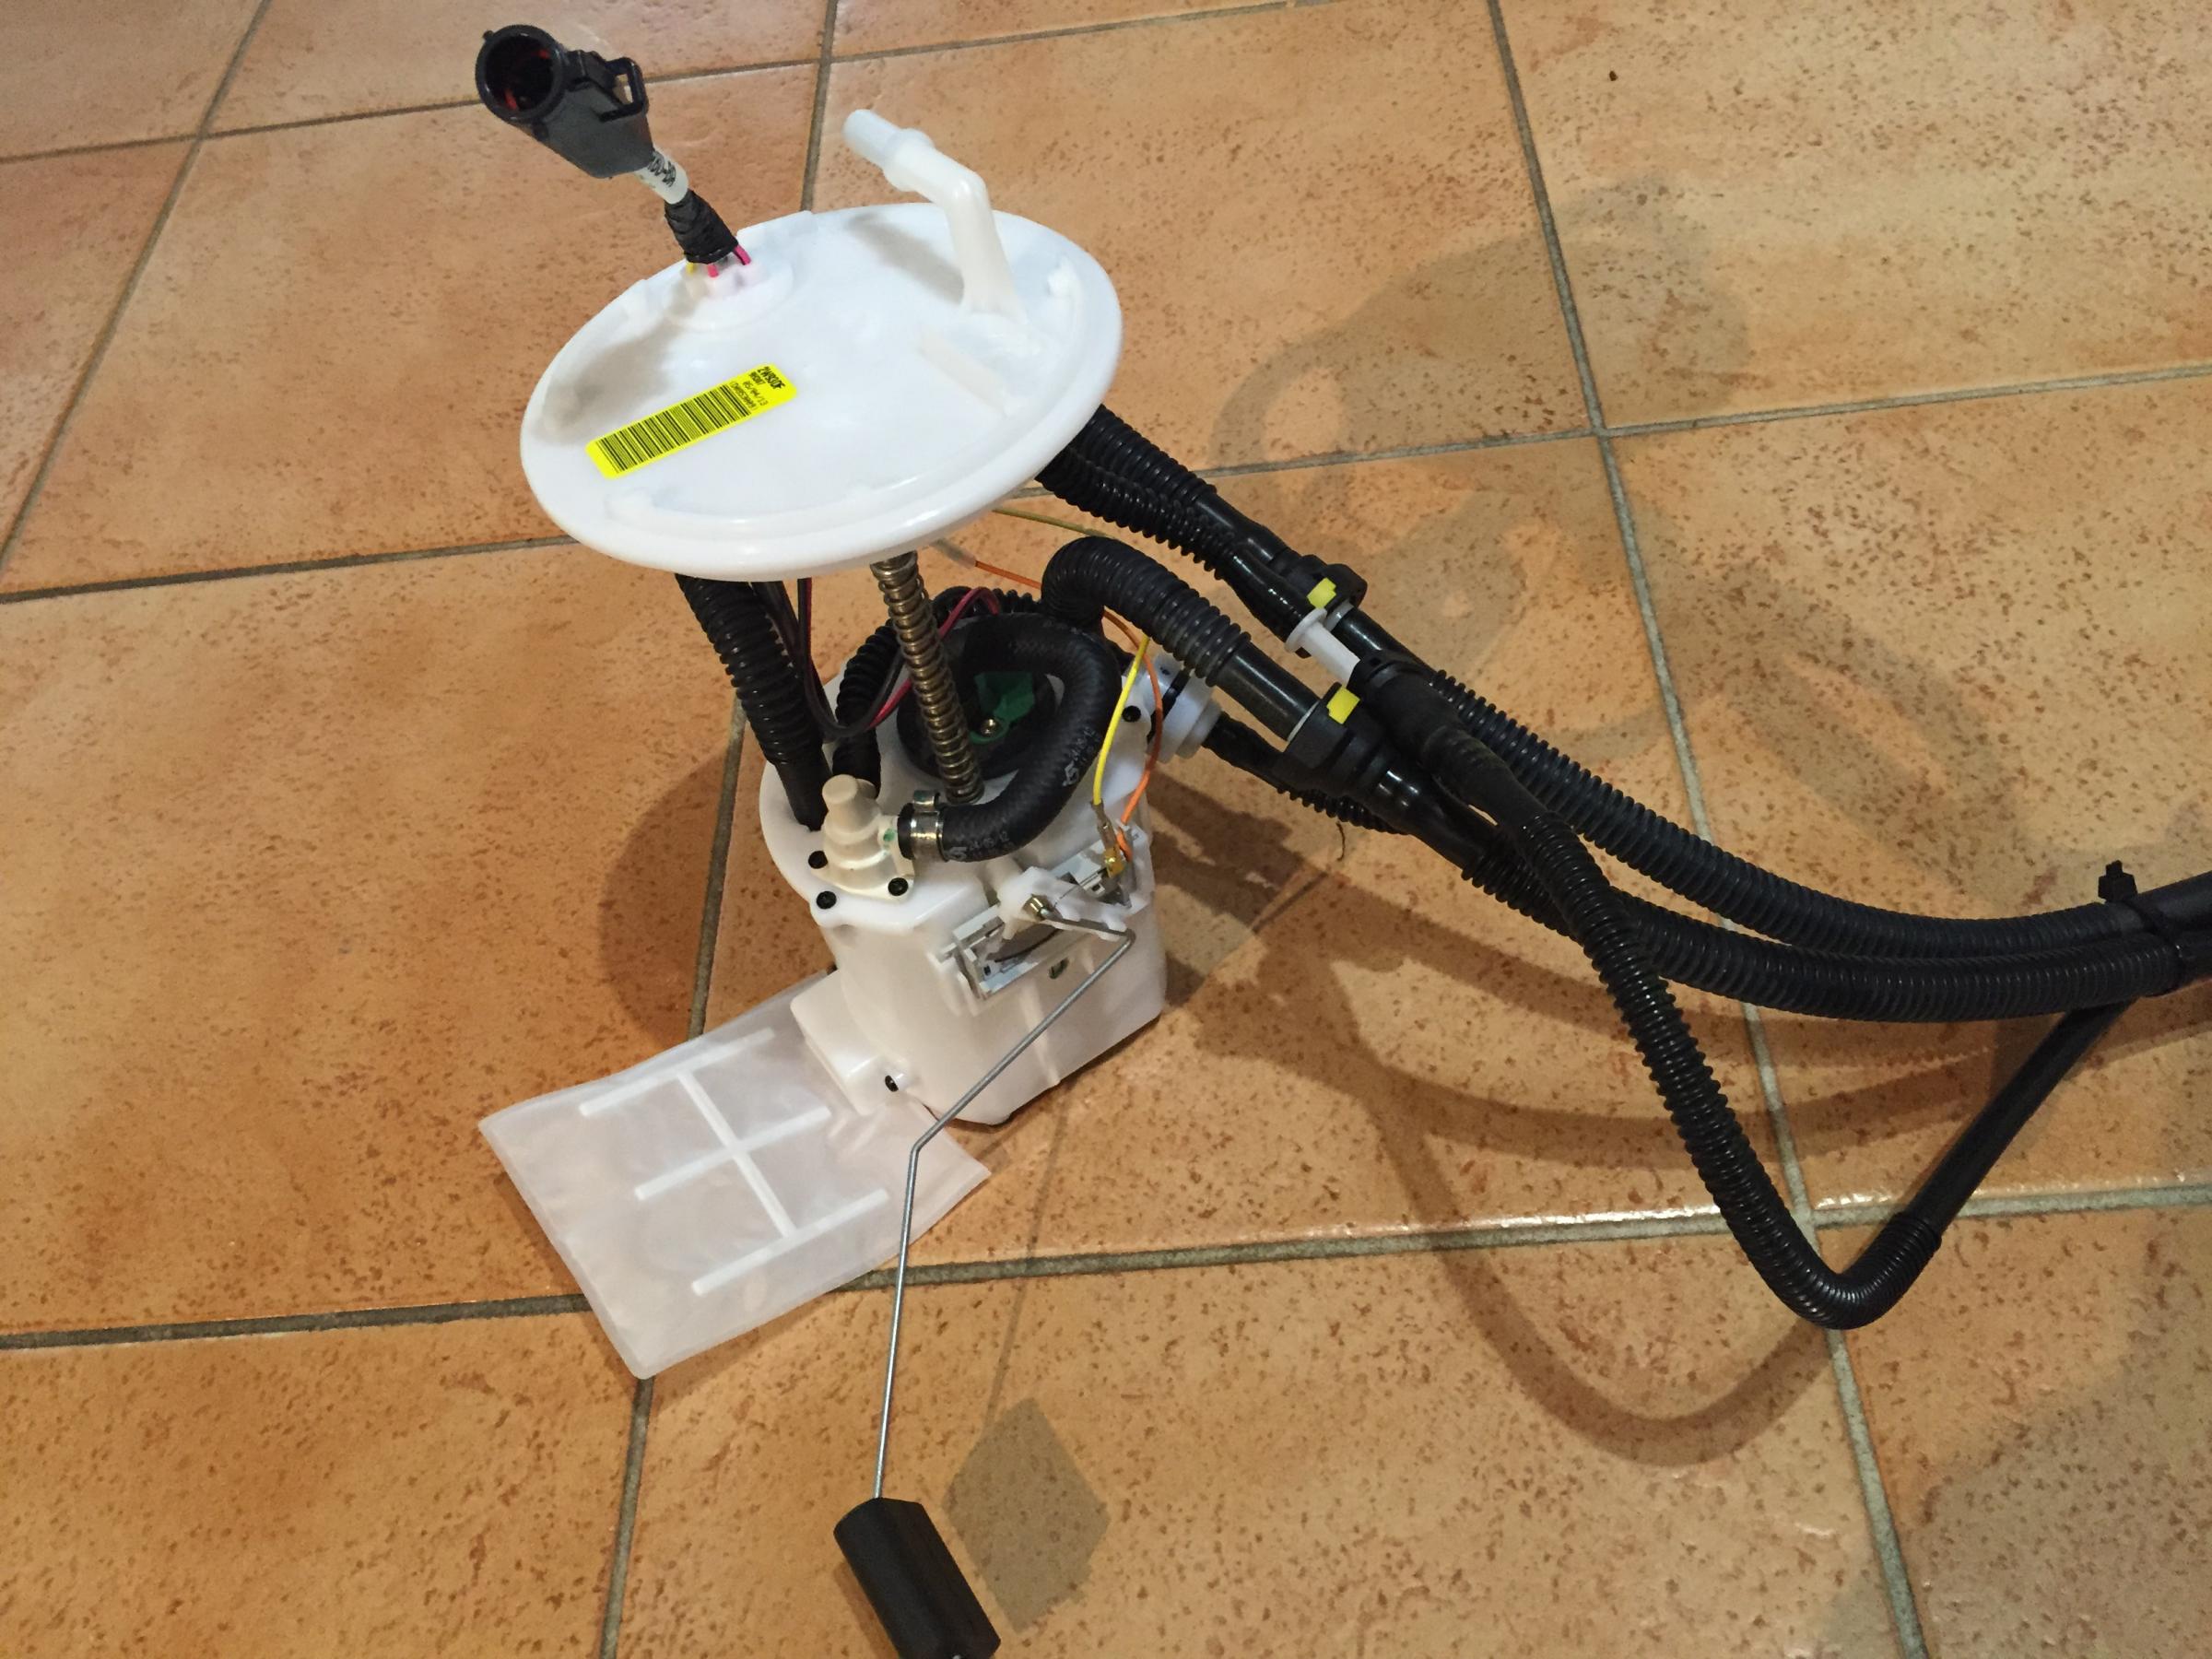
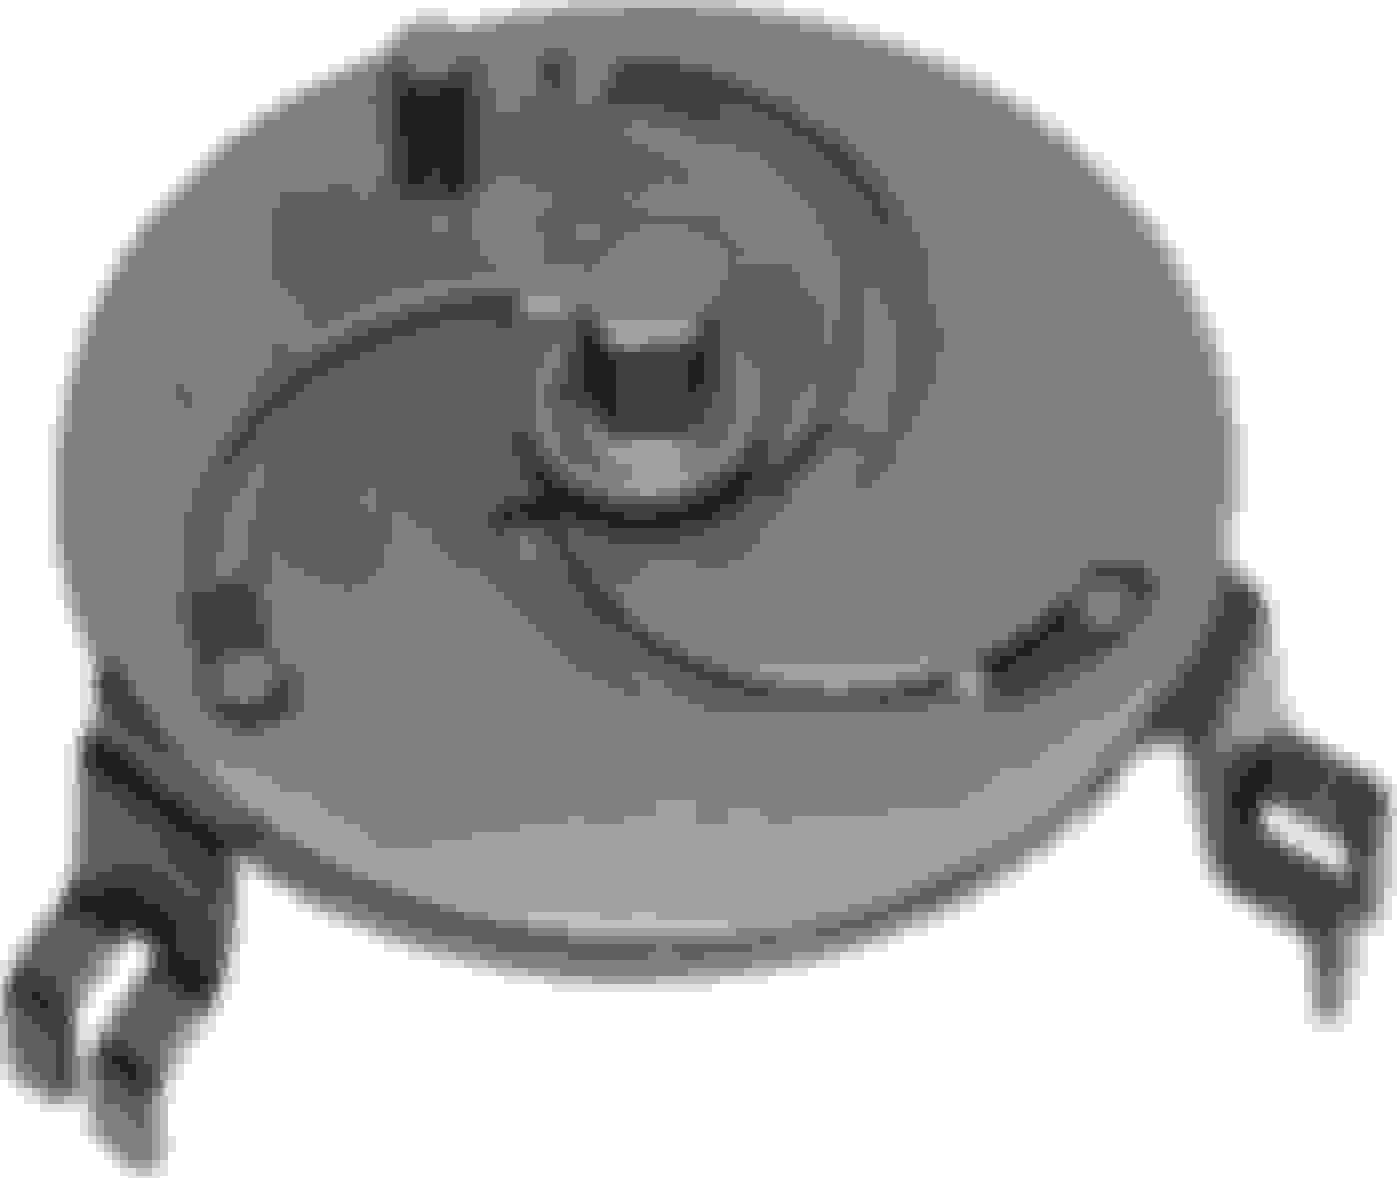
I knew each pump had a filter sock, but was rather surprised to discover there were actually 5 filters in the pumps. There is an additional filter sock directly on the inlet to the electric pump itself (see attachment). To get to this sock you need to remove the 5 torx screws from the pump unit to separate it. In addition each of the supply tubes for the two jet pump venturis have a filter mesh. I used carburettor cleaner to clean all of these, and removed an amazing amount of rubbish from the two pumps. I now seem to have a very solid 55 psi across the full rev range.
I got one surprise. On my very first post, when I joined the forum last year, I complained my engine had a slight vibration at 1250 rpm. Nobody seemed to be able to suggest a solution for me, but cleaning the pumps appears to have removed this vibration.
In the US we have a number of different pipe schedules or thickness's. You used a 6 inch Schedule 40 or 80 pipe?
I want to make one before I need it since it will be so cheap. Those plastic caps are very easy to break.
Kind of worring that you found so much junk in the screens. I wonder where it came from? You have a 2005 has the fuel tank recall been done?
There was some talk that the problem was the tank supplier did not clean the tank properly. Maybe that's what you are seeing?
.
.
Australia uses its own standard AS/NZS 1260, so I am not sure how that would correlate with US standards. This was normal, low pressure PVC sewer pipe. I measured it again this morning, internal diameter is 153 mm and wall thickness is 3.5 mm. I bought a metre length at the local hardware, cost about $20 all up. A small investment for a bit of peace of mind - from memory, the JTIS specifies 40 foot pound for tightening the rings so I think whacking them with a drift/mallet would be very risky.
Unfortunately I know little of the provenance of this car. It was manufactured February 2005. Whether the tank was changed or not, I have no record. I know the car spent 12 months without moving. Maybe the old fuel degraded? I have no idea. The tank itself looked clean inside.
Last edited by Cambo; Mar 16, 2015 at 06:51 AM.
Reason: fixed quote
The cutouts below the seat aren't exactly above the nuts so you can't put the tool perfectly straight down from the top, but the tool works even at a slight angle. The PVC has just enough spring to handle the misalignment.
Old pumps out, new pumps in, and I can actually hear the new ones whirring away at idle (couldn't hear the old ones before) so i'm hoping this solves my problem.
Roger, thank-you very much for sharing this brilliant idea. You're a top bloke.
I am resurrecting this old thread, one because it's a brilliant idea, and two to possibly save some U.S. members a little hassle.
I wanted to make this tool, but was surprised that nobody seemed to stock 6" Schedule 40 PVC pipe. It could be special ordered, but only in 20' sections. Searching online I discovered that Home Depot stocked a 2' section of 6" PVC, and my local store had some in stock.
The only problem is that the inside and outside dimensions are different than the one in OP's homemade tool, but I did the math and cut the twelve equal slots/sections in the pipe I got.
It might work in the S-Type because it looks like the OP was able to fit the pipe without interference, but as Cambo found on the X350 it will only go in at an angle. It still worked for him, because the pipe was a large enough diameter; however, the Home Depot pipe is just under 147mm. It's just too small to get any purchase on more than one or two tabs when it has to go in at that angle, and it slips off if any force is applied.
I imagine it could be made to work if the bottom was cut at the proper angle so it sits flush with the locking ring and the slots are cut in the right places. However, it was getting late, and I didn't feel like figuring it out.
So if you are in U.S. make sure you either get pipe with a large enough inside diameter, or try to remember your old geometry lessons.
Sounds like you got Schedule 80 instead of Schedule 40?
No, dimensions are quite different than Schedule 80. What I purchased was actually listed as being a SDR-35 2' Riser, but what's odd is that SDR-35 pipe is thinner and flimsier than Schedule 40. However, this riser is thicker walled than 40.
My guess is that since SDR-35 is thinner walled, the exterior diameter is smaller than Schedule 40, but this particular riser is made with a thicker wall so there is a significantly small inside diameter.
I was really surprised that no one around here stocked 6" PVC (it's a major metropolitan area). This one piece was the only off-shelf thing I could find.
That's what I love about this site, there is so much imagination when it comes to improvising. I'll pop this one in the database for future draw. Thanks
When I first bought my car, the fuel pumps had an issue of not transferring fuel from one side of the tank to the other. I knew sooner or later I would have to do something about the problem, but this involved removing the pumps and I kept baulking at the idea. My hesitation stemmed from most people's suggestion that you use a drift (or flat-bladed screwdriver) and a mallet to loosen the plastic retaining rings by driving against the flanges.
Twelve months later my hand was forced when the car failed to proceed 1000 km from home (20 psi fuel pressure at anything above idle). I decided to bite the bullet and make myself a removal tool. Fortuitously the internal diameter of 'six inch' sewer pipe is the same as the diameter of the fuel pump retaining rings (~154 mm), so I thought this was a good place to start. My idea was to cut 12 slots into the pipe to mate with the flanges on the rings. I have attached a series of photos below to illustrate the sequence of constructing my removal tool. I used a set of dividers to mark my pipe into twelve equal intervals (41.4 mm in the case of my pipe) and then I cut 4 mm wide slots to a depth of 27 mm. Add a hole to insert a bar and the job was done. The tool worked a treat and I still have 12 flanges on my retaining rings! One thing I found was it was useful to spray the threads on the rings with ezy-glide when reassembling them. They seemed to bind a bit otherwise.
While this is a post about making a removal tool, I thought I would pass on some information on what I found once I removed the two pumps (left hand side jet pump and right side electric pump).
I knew each pump had a filter sock, but was rather surprised to discover there were actually 5 filters in the pumps. There is an additional filter sock directly on the inlet to the electric pump itself (see attachment). To get to this sock you need to remove the 5 torx screws from the pump unit to separate it. In addition each of the supply tubes for the two jet pump venturis have a filter mesh. I used carburettor cleaner to clean all of these, and removed an amazing amount of rubbish from the two pumps. I now seem to have a very solid 55 psi across the full rev range.
I got one surprise. On my very first post, when I joined the forum last year, I complained my engine had a slight vibration at 1250 rpm. Nobody seemed to be able to suggest a solution for me, but cleaning the pumps appears to have removed this vibration.
Hi,am new in this forum and av been following it most of the time and managed to solve one or two problems on my s type jaguar....thats a great tool for removing the top lid for fuel pump,
We are late to this thread (very late) but just as a reminder the Coventry Foundation loans tools to Foundation Patrons and members of the Jaguar Club of North America. We loan in the US, Canada. and Mexico to those folks. I have included the factory tools for pump removal as there were several. Enjoy.
I gambled on a $20 version from eBay. It seems to be sturdy and well constructed. It would appear to securely engage the plastic lock ring, but I have not had a need to try it yet.
I replaced my fuel pump recently. I didn't need any special tools. I used a 15" 1x2 piece of wood and tapped the cap with my rubber mallet very gently. It came right off. The real issue is the connectors. If you twist or scratch them, you might get a free a leak. I won't go into what you have to do to fix a fitting leak but it will test your wits.
Last edited by davidladewig; Feb 23, 2024 at 08:48 PM.
If you are not doing this every week, for many without a good workshop, the effort of making the tool is high for the increase in usability. As DB has said, Gently tapping the cover free isn't such a risky deal
Getting the connectors out is trick though and a slight press down befor pulling can free the next catch step. You might have to repeat this a few times before you pass all the ridges.